> ## Documentation Index
> Fetch the complete documentation index at: https://docs.hedera.com/llms.txt
> Use this file to discover all available pages before exploring further.
# Deploy your First Contract with Hedera Contract Builder
## Hedera Contract Builder Quickstart
The Hedera Contract Builder allows you to deploy smart contracts on the Hedera testnet quickly. The tool is provided through the Hedera Developer Portal.
**Developing or running CI?** [Solo](https://solo.hiero.org/docs/) runs a full Hedera network locally, no testnet rate limits, faucet, or resets, and works with the same EVM tooling. See the [Solo quickstart](https://solo.hiero.org/docs/simple-solo-setup/quickstart/) and [Using Solo with EVM tools](https://solo.hiero.org/docs/using-solo/using-solo-with-evm-tools/).
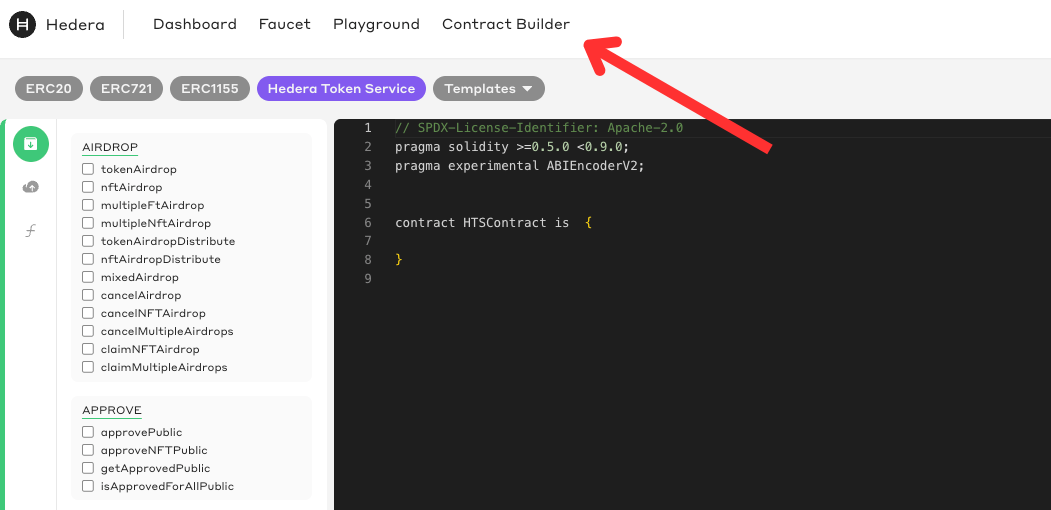
Head over to the [Hedera Smart Contract Builder](https://portal.hedera.com/contract-builder), a powerful web-based IDE for compiling and deploying contracts.
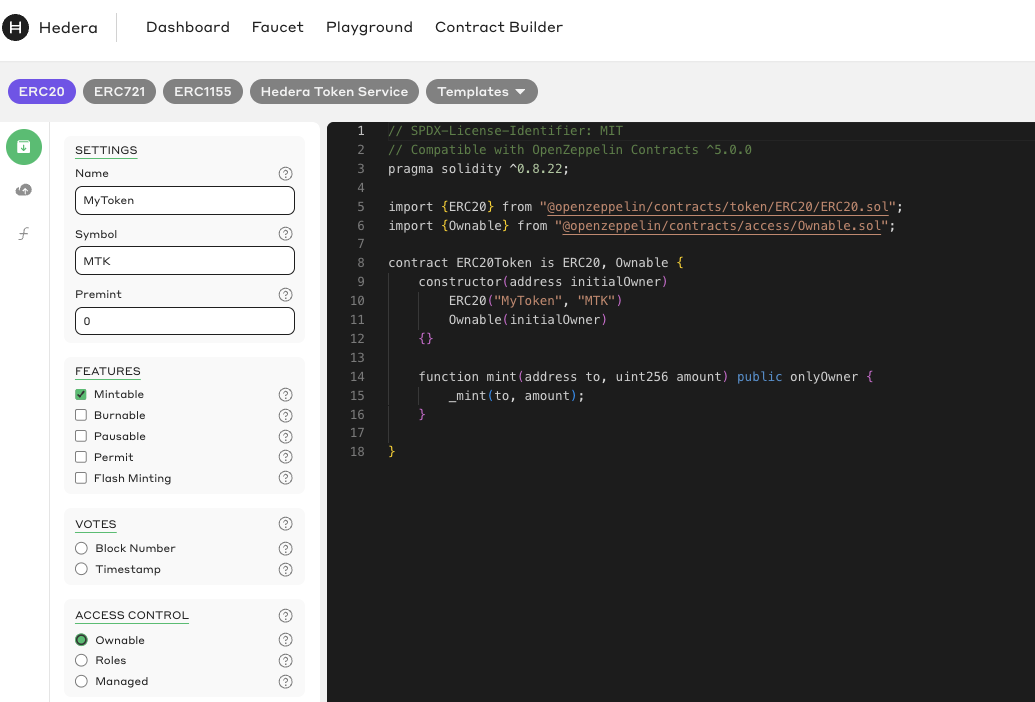
 Select the ERC20 option at the top and modify its settings. Let's create a token with the "Mintable" feature and set access control to "Ownable." Once you've done that, click the "Compile" button at the bottom left of the page.
 #### **Please note**
These smart contracts are not audited and are intended for learning purposes only. By accepting this disclaimer, you acknowledge that you understand the risks involved in deploying unaudited contracts. For more information, please see our terms of service: [https://hedera.com/terms](https://hedera.com/terms)
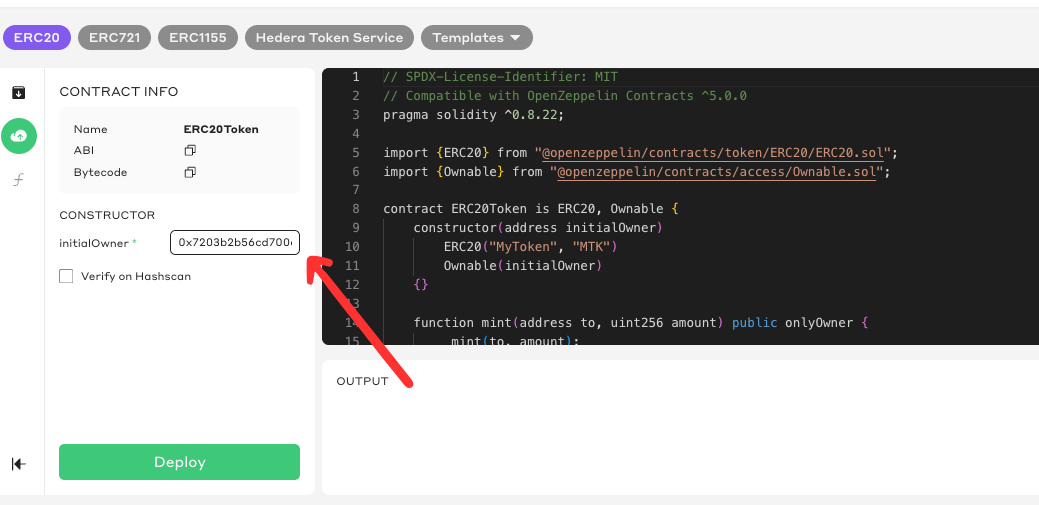
Finally, you can deploy your contract. First, copy your EVM account address at the top right of your profile information.
#### **Please note**
These smart contracts are not audited and are intended for learning purposes only. By accepting this disclaimer, you acknowledge that you understand the risks involved in deploying unaudited contracts. For more information, please see our terms of service: [https://hedera.com/terms](https://hedera.com/terms)
Finally, you can deploy your contract. First, copy your EVM account address at the top right of your profile information.
 Next, let's paste the address in the constructor argument `initialOwner` for our ERC-20 contract. This address will be assigned the role of minting new tokens.
 Click the "Deploy" button to deploy the contract. Once your contract is deployed, you get an interface where you can interact with your smart contract.
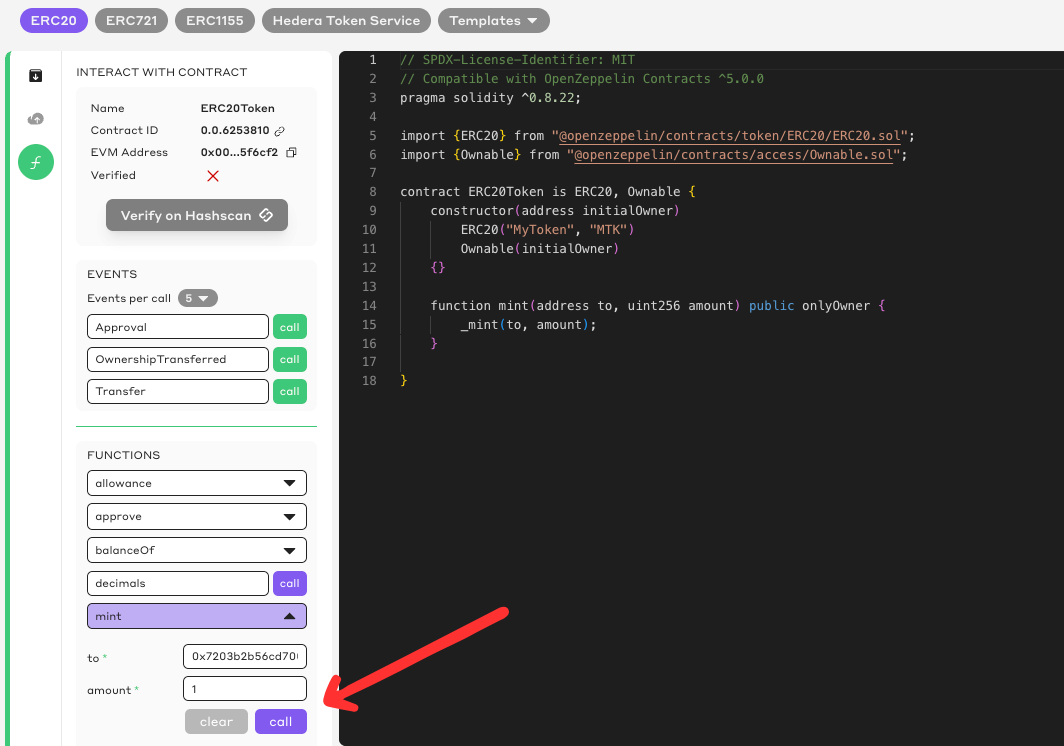
Let's use the interface to mint a new token. Expand the mint function, and let's mint a token for ourselves. Paste your EVM address in the `to` field and set the amount equal to 1.
Click the "Deploy" button to deploy the contract. Once your contract is deployed, you get an interface where you can interact with your smart contract.
Let's use the interface to mint a new token. Expand the mint function, and let's mint a token for ourselves. Paste your EVM address in the `to` field and set the amount equal to 1.
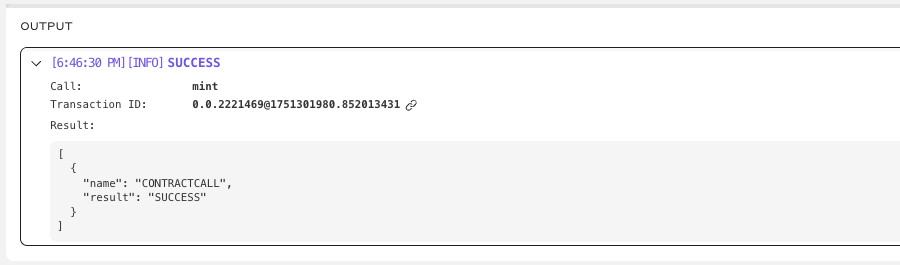
 **Expanding the output area allows you to check the status of your function call. If you see a status message "SUCCESS," you've successfully minted an ERC-20 token on Hedera.**