> ## Documentation Index
> Fetch the complete documentation index at: https://docs.hedera.com/llms.txt
> Use this file to discover all available pages before exploring further.
# Hedera Testnet Faucet
> Get testnet HBAR using the Hedera Portal or faucet: fund an EVM wallet address instantly or create a portal account with a stable Account ID and keys.
There are two ways to get testnet HBAR:
* **Hedera Portal**: [create a portal account](https://portal.hedera.com) for a fully provisioned testnet account with a stable Account ID, private key, and access to all developer tools. No EVM wallet required.
* **Faucet**: paste any EVM wallet address to instantly fund an account. No portal account needed.
The faucet auto-creates a Hedera account when you enter an EVM wallet address for the first time.
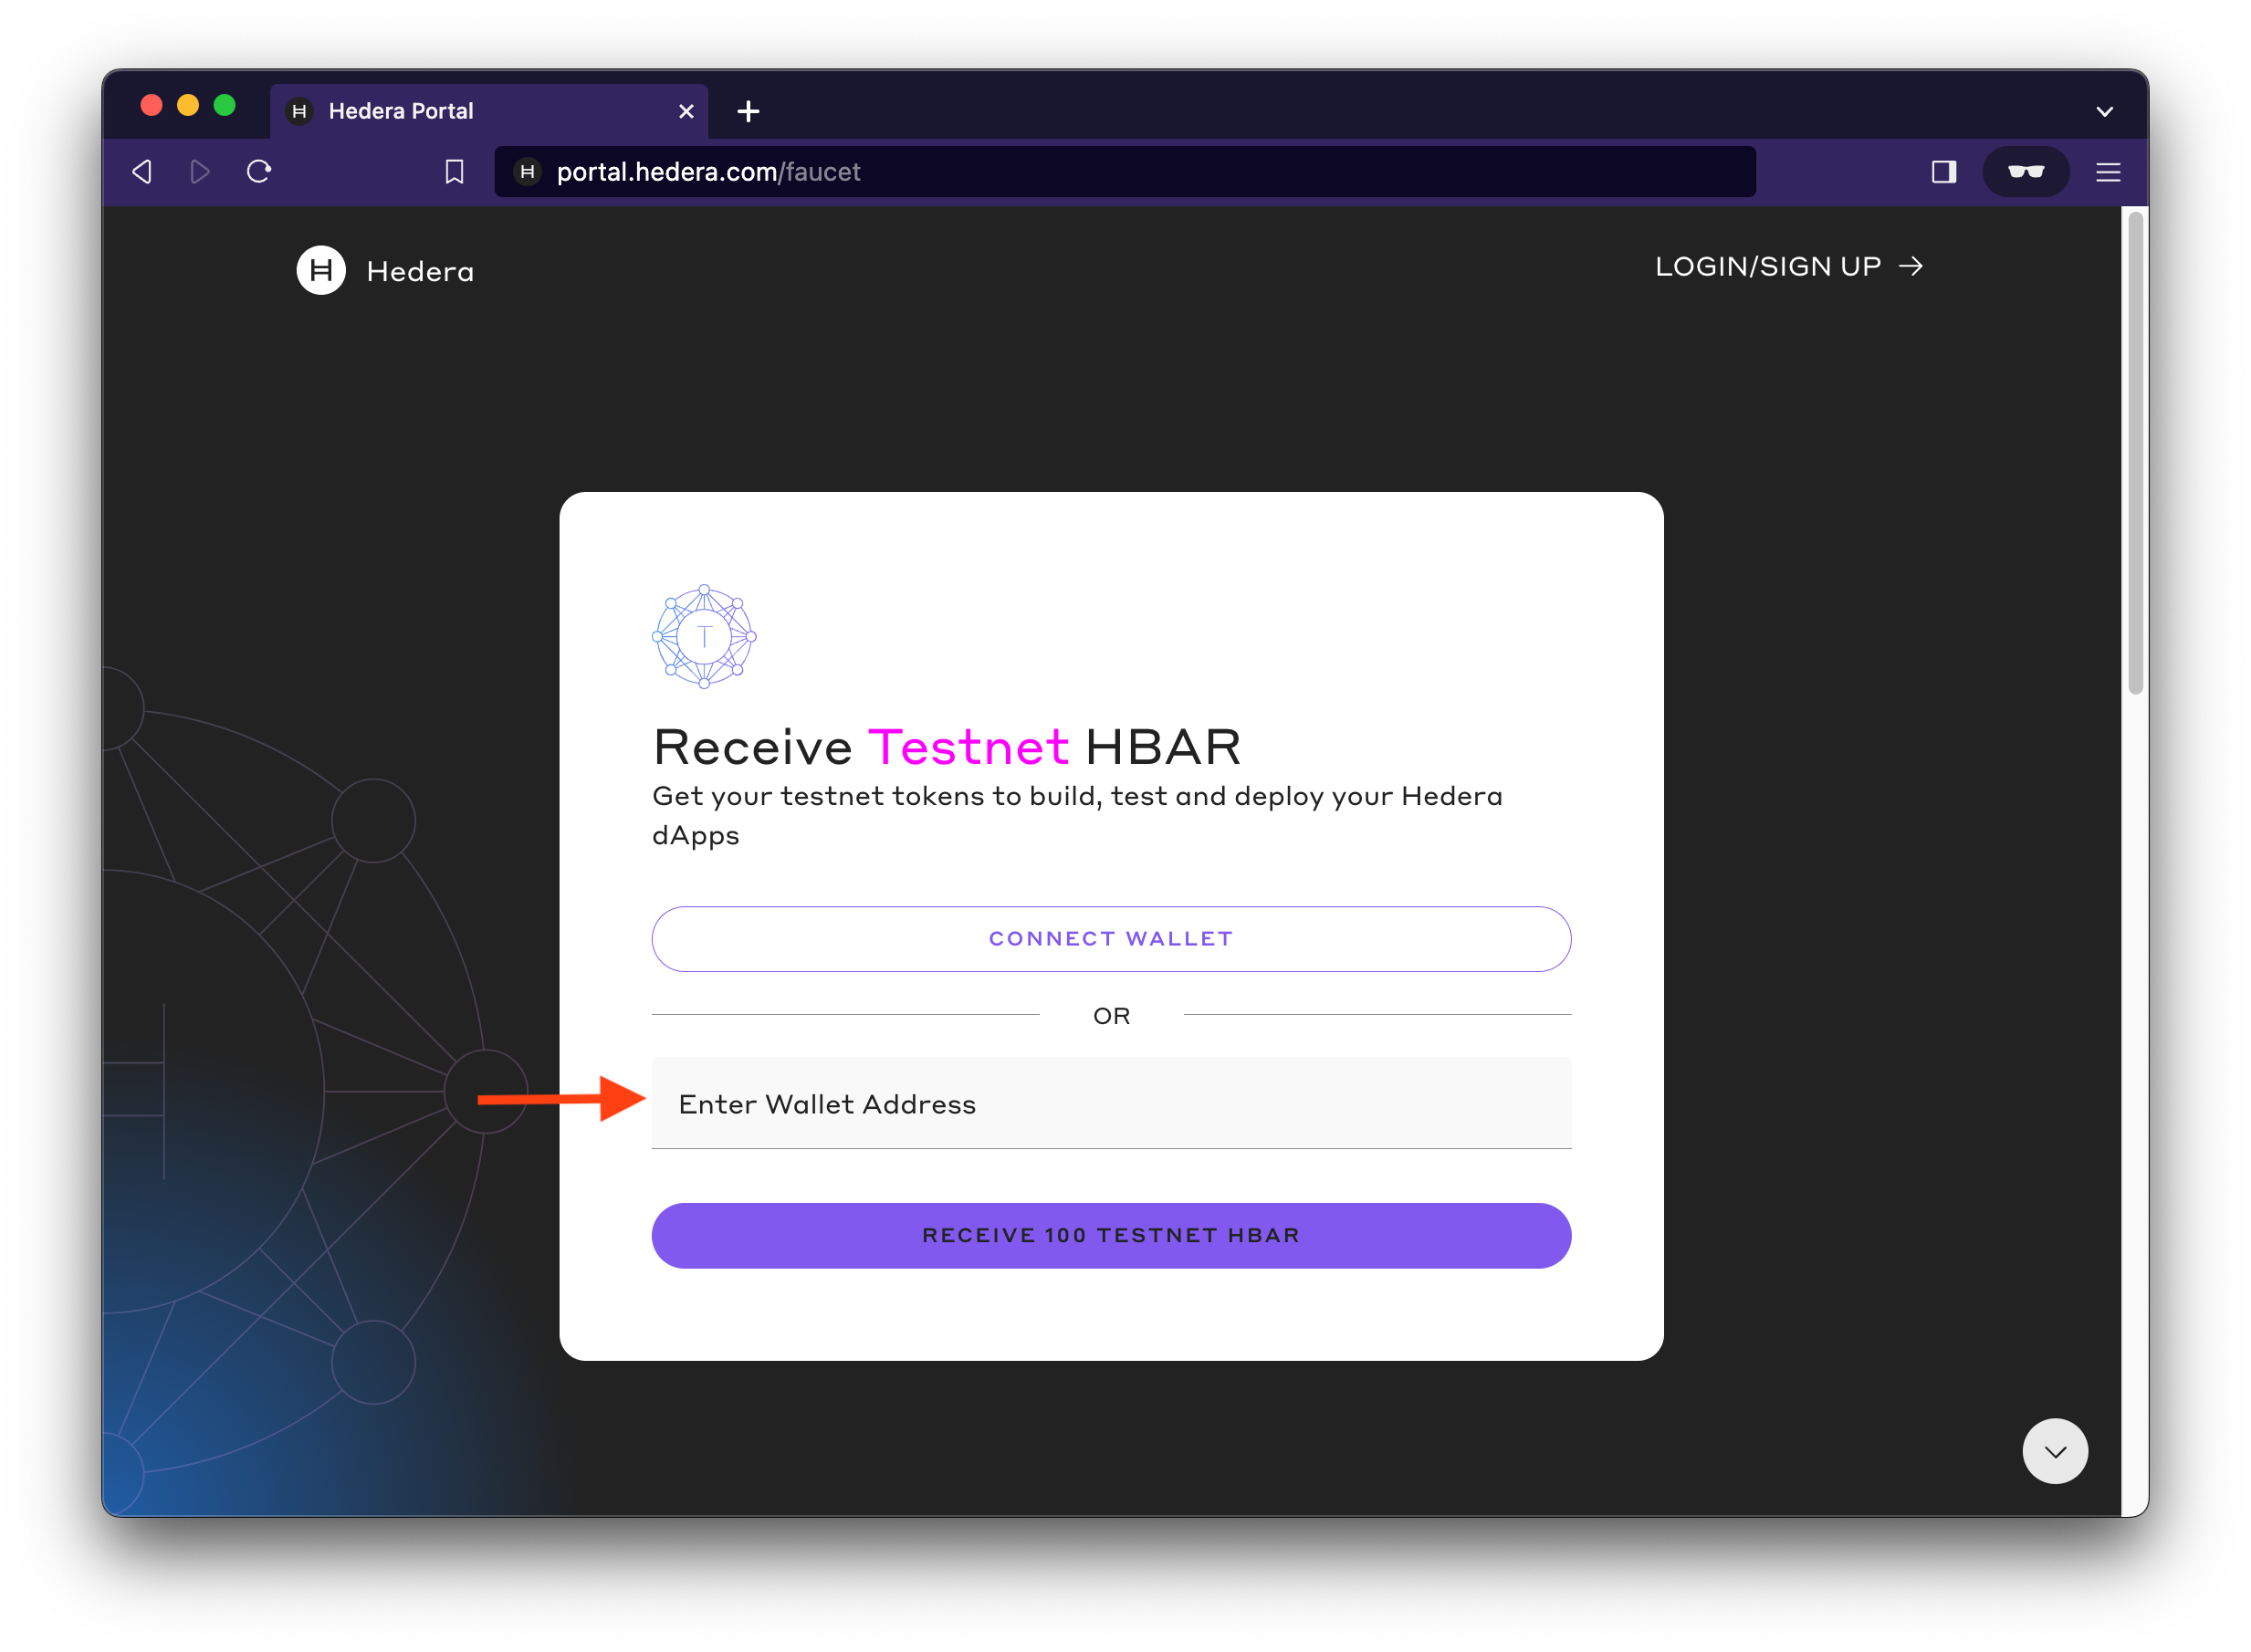
To use the faucet, head to the [faucet](https://portal.hedera.com/faucet) landing page.
* Enter your EVM wallet address in the **Enter Wallet Address** field and
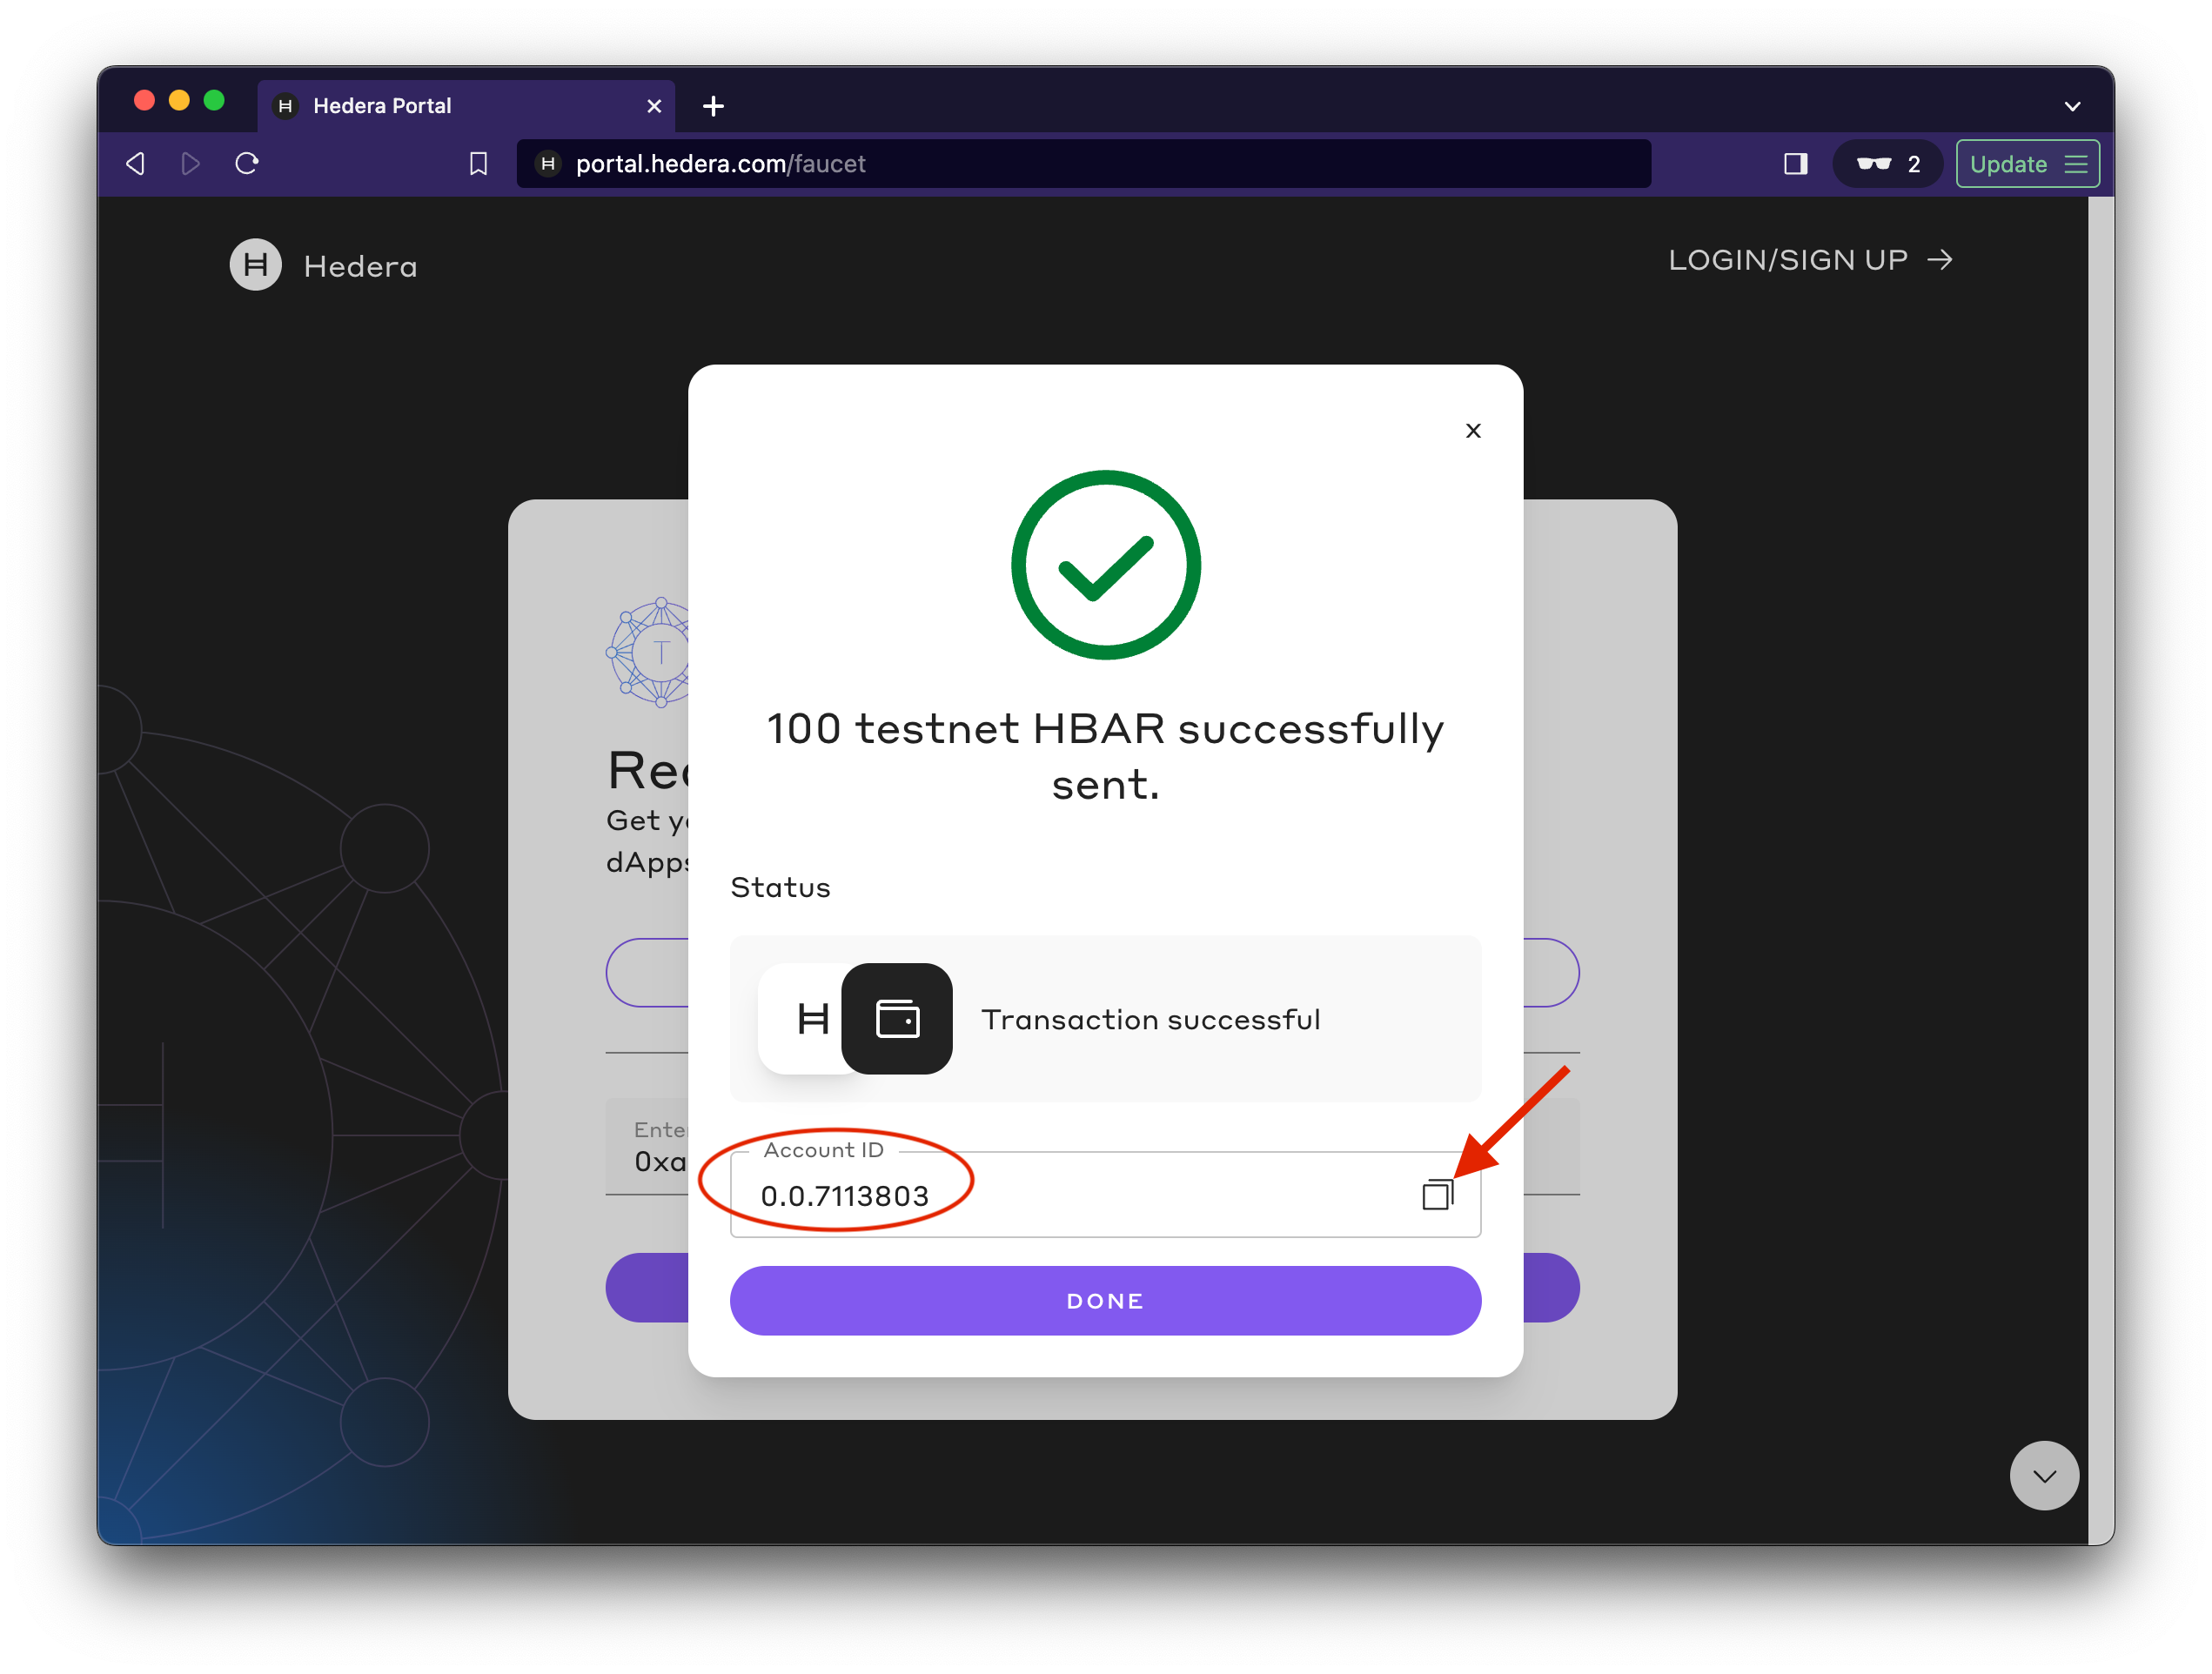
* Click the **RECEIVE 100 TESTNET HBAR** button to initiate an [auto account creation](/learn/core-concepts/accounts/auto-account-creation) flow that creates and funds a new testnet account
#### ⚠️ **Important**
When you use an EVM wallet address for the first time, [**Auto Account Creation**](/learn/core-concepts/accounts/auto-account-creation) kicks in to establish a new Hedera account linked to your EVM address.
This process creates a **hollow account**, an account with an Account ID and your EVM address set as its alias, but no signing key on record yet. Hollow accounts can receive HBAR and tokens, but cannot transfer funds or modify account properties until completed.
To complete the account, use it as the **fee payer** in a transaction and sign with the ECDSA private key corresponding to your EVM address. Once completed, it behaves like any regular Hedera account.
For a full explanation of the Hedera account model, hollow accounts, and accounts without an ECDSA key, see [Account Model for EVM Developers](/evm/development/accounts).
 ## Environment Variable Setup (Optional)
This section is for developers who want to set up their environment for production use. If you plan to use Hardhat, Foundry, or other development frameworks, complete this step to configure your environment variable. Skip if you're just getting started.
If you plan to use Hardhat, Foundry, or other development frameworks, you'll want to set up environment variables:
1. **Export your private key from MetaMask:**
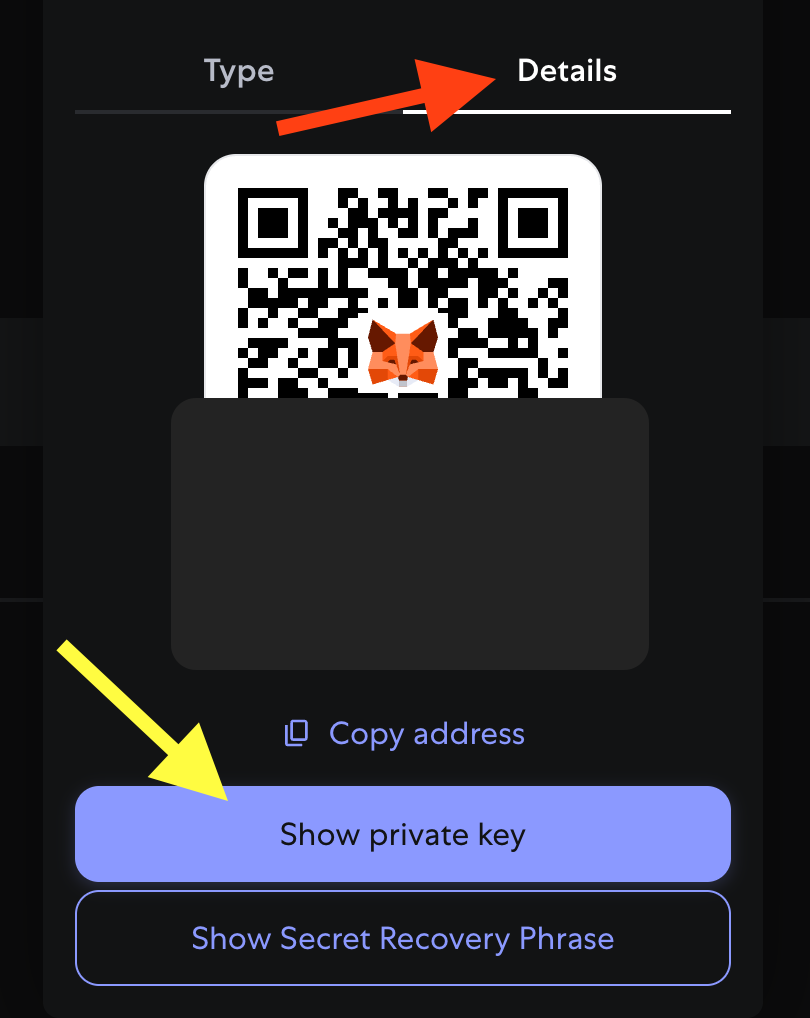
1. Click the **three dots menu** → **Account details** → **Show private key**
2. Copy the private key (64-character hex string)
## Environment Variable Setup (Optional)
This section is for developers who want to set up their environment for production use. If you plan to use Hardhat, Foundry, or other development frameworks, complete this step to configure your environment variable. Skip if you're just getting started.
If you plan to use Hardhat, Foundry, or other development frameworks, you'll want to set up environment variables:
1. **Export your private key from MetaMask:**
1. Click the **three dots menu** → **Account details** → **Show private key**
2. Copy the private key (64-character hex string)
 For detailed instructions on exporting your private key, refer to [this how-to
guide](https://support.metamask.io/managing-my-wallet/secret-recovery-phrase-and-private-keys/how-to-export-an-accounts-private-key/).
Keep your private keys secure. Anyone with access to them can control your
wallet and any funds.
2. **Create a `.env` file** in your project directory with your account credentials
```
# private key exported from MetaMask
OPERATOR_KEY=0xc89f760d43832...
# new testnet account ID
OPERATOR_ID=0.0.1234
# Hedera testnet RPC endpoint
RPC_URL=https://testnet.hashio.io/api
```
#### Warning
Storing private keys in a `.env` file is not considered best practice. There is always a risk of accidentally committing and pushing to a public GitHub repo and exposing your keys. Make it a habit to add `.env` to your `.gitignore` file as a precautionary measure.
We **highly advise against** using a private key with mainnet funds.
**Building locally?** [Solo](https://solo.hiero.org/docs/) lets you run a full Hedera network on your own machine — no faucet, no resets, no throttles. It works with MetaMask, Hardhat, and Foundry out of the box. See the [Solo quickstart](https://solo.hiero.org/docs/simple-solo-setup/quickstart/) or [Using Solo with EVM tools](https://solo.hiero.org/docs/using-solo/using-solo-with-evm-tools/) to get started.
## Next Step
* [Deploy a Smart Contract Using Remix](/evm/quickstart/deploy-with-remix)
* [Deploy your First Contract with Contract Builder](/evm/quickstart/deploy-with-contract-builder)
For detailed instructions on exporting your private key, refer to [this how-to
guide](https://support.metamask.io/managing-my-wallet/secret-recovery-phrase-and-private-keys/how-to-export-an-accounts-private-key/).
Keep your private keys secure. Anyone with access to them can control your
wallet and any funds.
2. **Create a `.env` file** in your project directory with your account credentials
```
# private key exported from MetaMask
OPERATOR_KEY=0xc89f760d43832...
# new testnet account ID
OPERATOR_ID=0.0.1234
# Hedera testnet RPC endpoint
RPC_URL=https://testnet.hashio.io/api
```
#### Warning
Storing private keys in a `.env` file is not considered best practice. There is always a risk of accidentally committing and pushing to a public GitHub repo and exposing your keys. Make it a habit to add `.env` to your `.gitignore` file as a precautionary measure.
We **highly advise against** using a private key with mainnet funds.
**Building locally?** [Solo](https://solo.hiero.org/docs/) lets you run a full Hedera network on your own machine — no faucet, no resets, no throttles. It works with MetaMask, Hardhat, and Foundry out of the box. See the [Solo quickstart](https://solo.hiero.org/docs/simple-solo-setup/quickstart/) or [Using Solo with EVM tools](https://solo.hiero.org/docs/using-solo/using-solo-with-evm-tools/) to get started.
## Next Step
* [Deploy a Smart Contract Using Remix](/evm/quickstart/deploy-with-remix)
* [Deploy your First Contract with Contract Builder](/evm/quickstart/deploy-with-contract-builder)