Table of Contents
- Prerequisites
- Install Stablecoin Studio
- Configure CLI
- CLI Flow
- Start CLI
- Create Stablecoin
- Operate Stablecoin
- Configure Proof-of-Reserve
- Additional Resources
Prerequisites
- NodeJS >= 18.13
- Solidity >= 0.8.16
- TypeScript >= 4.7
- Git Command Line
- Hedera Testnet Account
- HashPack Wallet
Install Stablecoin Studio
Open a new terminal and navigate to your preferred directory where you want your Stablecoin Studio project to live. Clone the repo using this command:npm package globally:
Configure CLI
To use the CLI correctly, it is necessary to generate a configuration file where the default network, their associated accounts, and the factory contract ID will be included. These parameters can be modified later on.Create a config file
From the root of thecli directory, start the command line tool and create a configuration file using the wizard command:
wizard command in your terminal, if you haven’t added your default configuration path, the interface will prompt you to “Write your config path.” To use the default configuration path, hit enter. This will walk you through the prompts where you will input your configuration settings and create your hsca-config-yaml file.
Let’s go over the configuration details:
defaultNetwork
This sets the default network the application will connect to when it starts. It’s essential for defining the environment where transactions will occur (e.g., testnet for testing, mainnet for production). We will be using testnet for this tutorial.
networks
This property contains a list of Hedera networks that the application can connect to. Each entry specifies the name of a network and a list of consensus nodes, allowing you to switch between different Hedera environments easily.
accounts
This property holds the credentials for various Hedera accounts. Each account has an accountId, a privateKey, and a network association. This is critical for performing transactions, as the private key is used to sign them. The alias field provides a user-friendly identifier for the account and importedTokens can store any tokens imported into this account. You can use the Hedera Developer Portal to create the default testnet account.
mirrors
This property lists the available Hedera mirror nodes for each network. Mirror nodes hold historical data and can be queried for transactions, records, etc. The selected field indicates whether the mirror node is the default one to be used.
rpcs
This property specifies the RPC (Remote Procedure Call) servers available for connecting to Consensus Node services. RPCs are essential for querying smart contracts, among other functionalities. Similar to mirror nodes, the selected field indicates the default RPC to use.
logs
Here, you can specify the path where log files will be stored (path) and the level of logging detail you want (level). For example, setting the level to ERROR will only log error events.
factories
This property lists factory contract IDs (id) and their associated network. Factories are smart contracts that can create other contracts. By listing them here, the application knows which factories it can interact with on each network.
Example configured <code>hsca-config.yaml</code> file ✅
Example configured <code>hsca-config.yaml</code> file ✅
Factory contracts
We provide default contract addresses for factories that we have deployed for anyone to use. They are updated whenever a new version is released.| Contract name | Address | Network |
|---|---|---|
| FactoryAddress | 0.0.14455068 | Testnet |
| FactoryAddress | 0.0.XXXXXX | Previewnet |
For example, theERC20Factoryis a contract that facilitates the deployment of new ERC20 tokens. The factory uses theEIP1167standard for simply and cheaply cloning contract functionality.
Deploy custom factory contract (optional)
If you want to deploy your own factory contract with custom logic tailored to your specific needs, check out the/contracts folder README for a comprehensive guide.
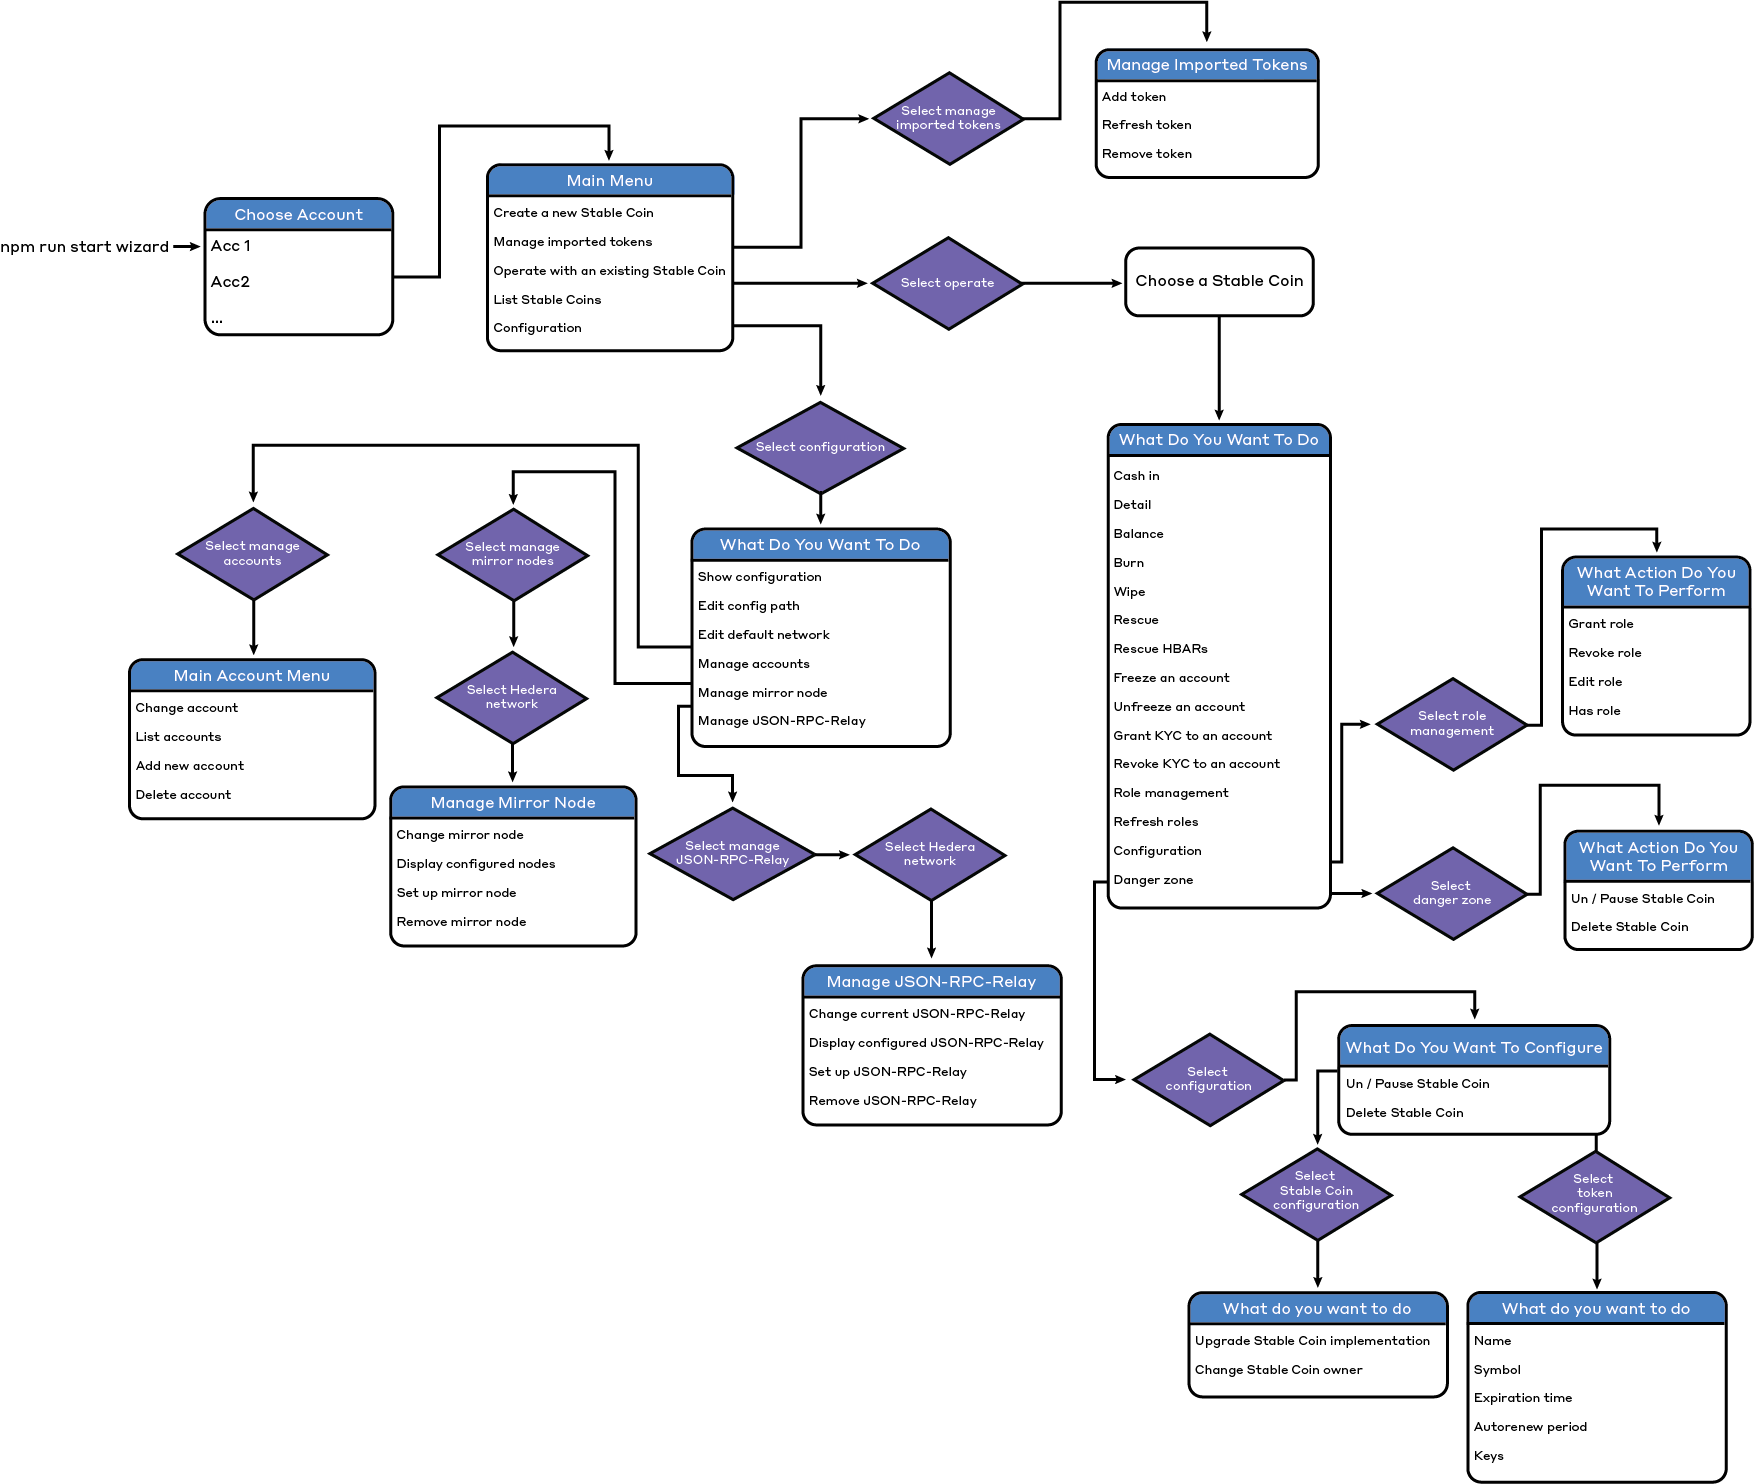
CLI Flow
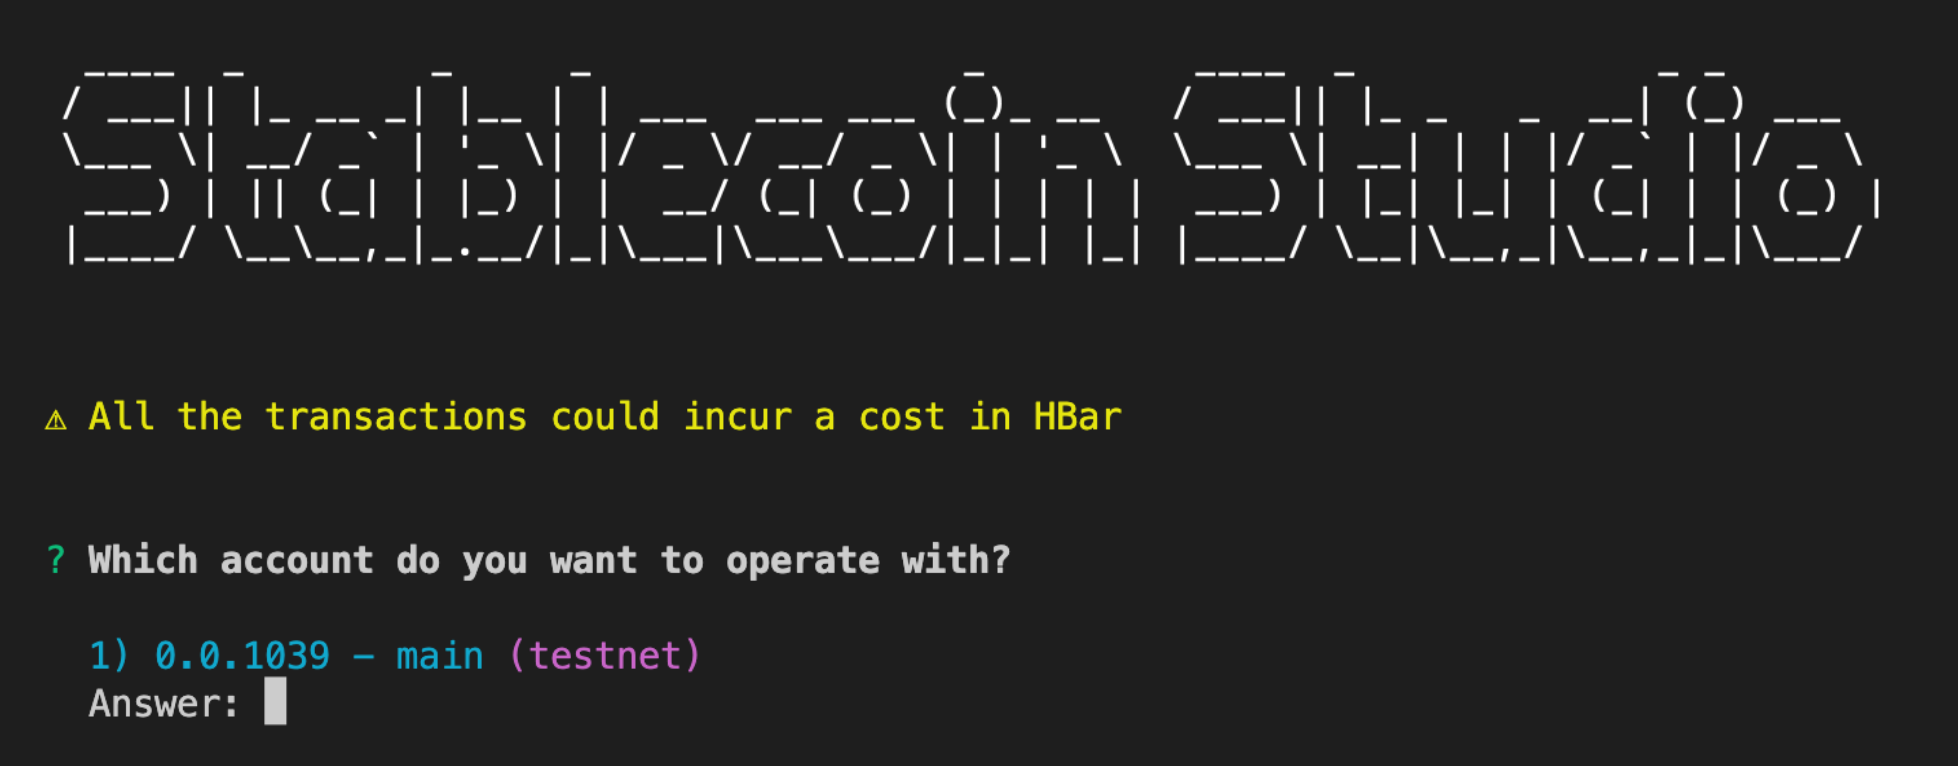
Start CLI
Start the CLI tool using thewizard command:
Main Menu
The main menu will be displayed once you select an account you want to operate with. Choose one of the stablecoin management menu options listed and follow the prompts in your interface. Let’s review each option to give you a better understanding of what’s available to you:Create a new stablecoin
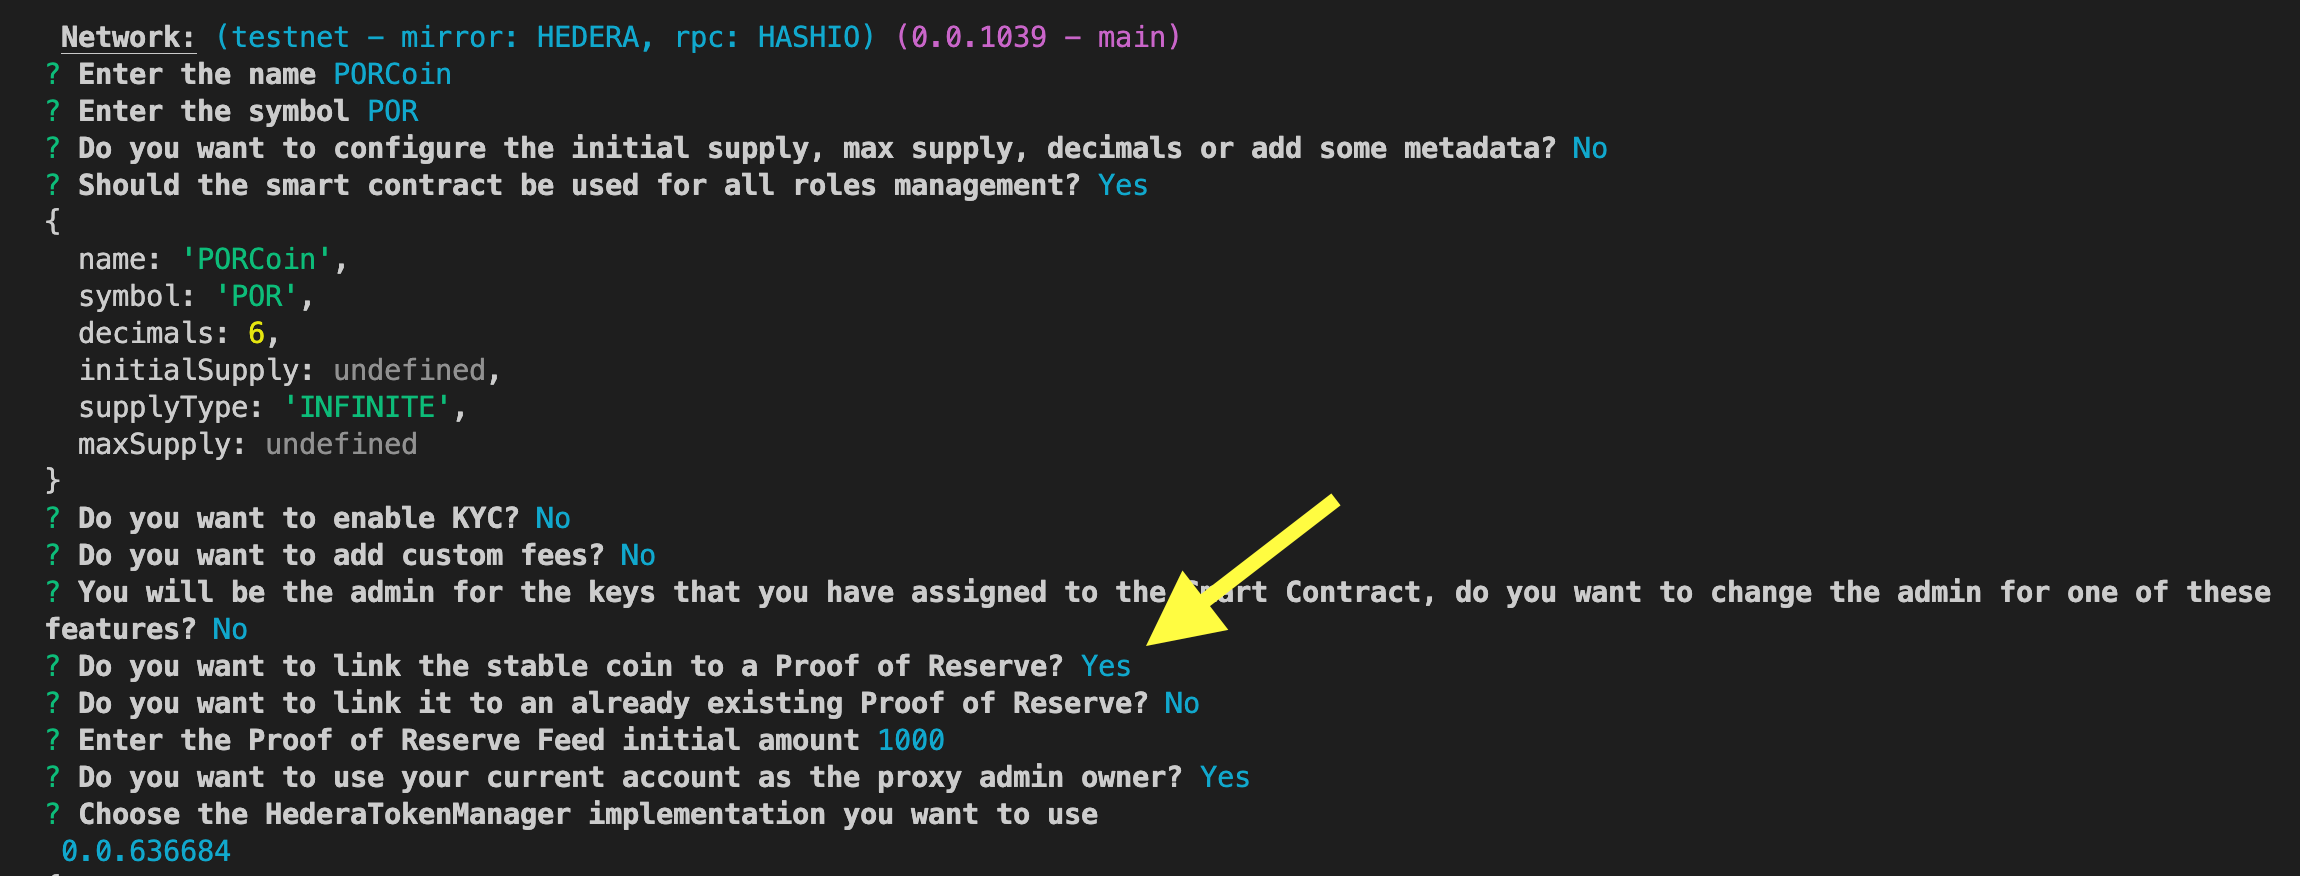
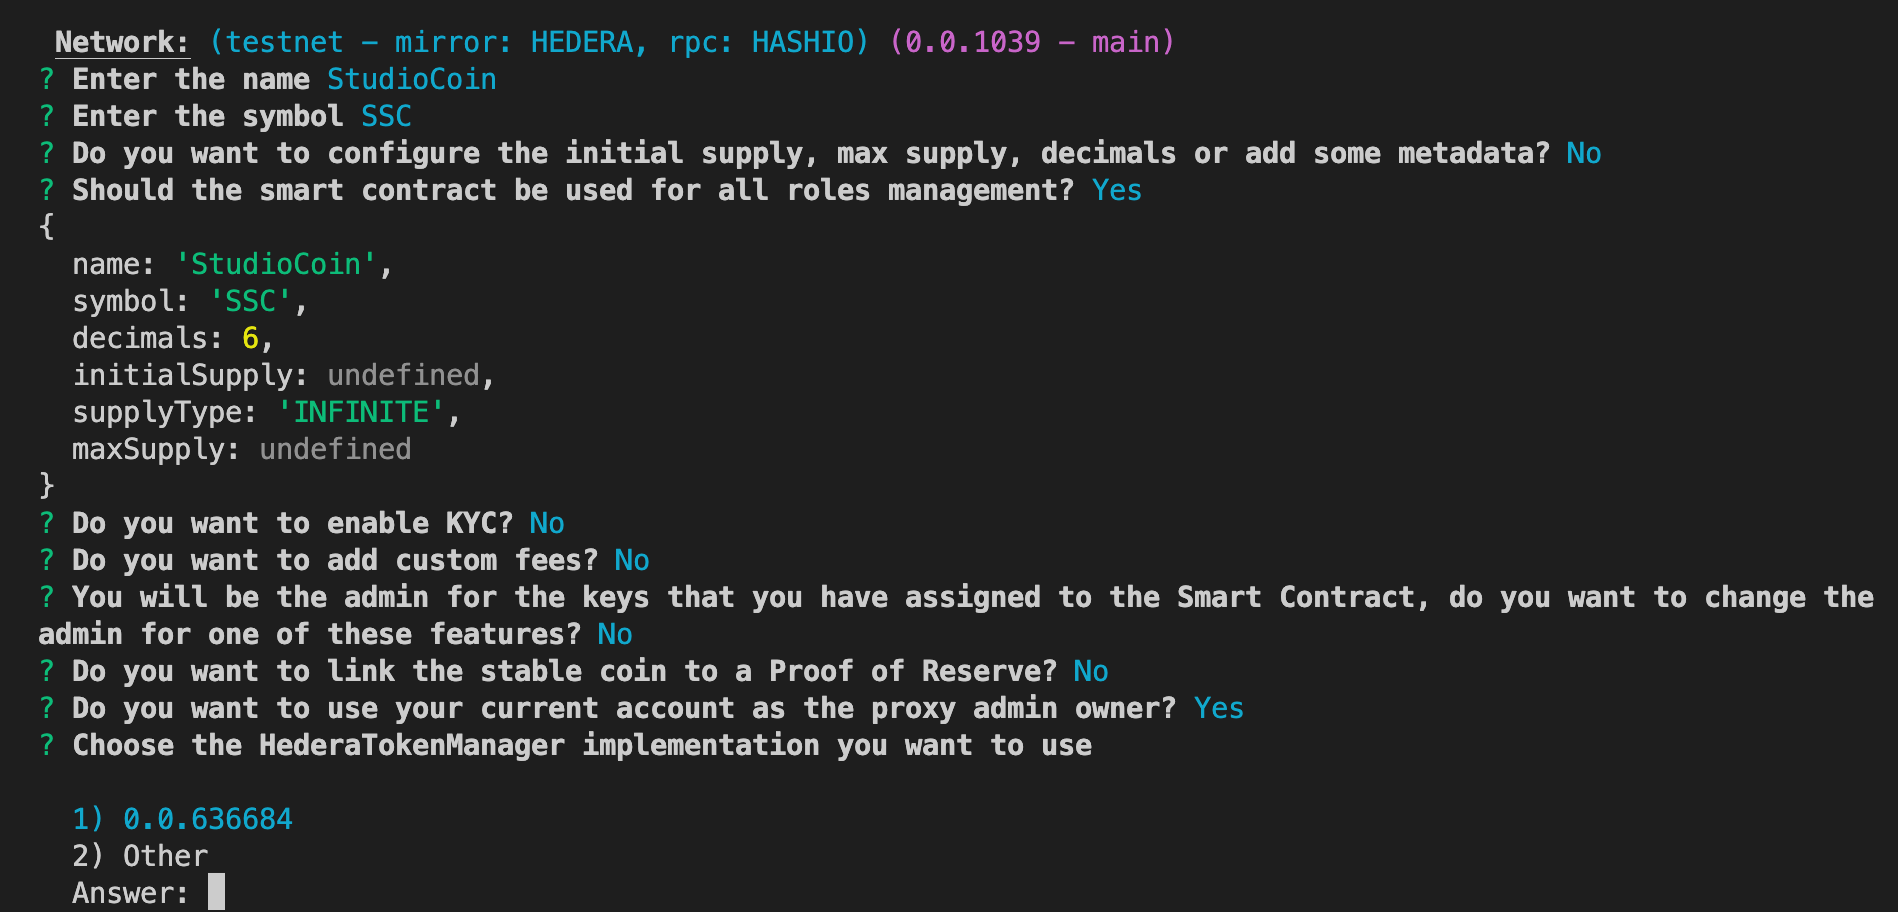
Create a new stablecoin
This option starts your stablecoin creation process and where you will fill in the details of your stablecoin. Details such as:
- Set Factory: Before anything else, specify the factory you’ll be using. You can find the list of deployed factories in our documentation.
- Basic Details: Input essential information like the stablecoin’s name and symbol.
- Auto-Renew Account: This is set by default to your current account, enabling the stablecoin creation process.
- Optional Details: You’ll be prompted to add details like decimal count, initial, and max supply. Default values are used if you skip.
- Token Keys Ownership: Decide whether the smart contract should own all underlying token keys like pause and wipe.
- KYC: Choose whether to enable KYC. If yes, specify the KYC key and decide whether to grant KYC to the current account during stablecoin creation.
- Custom Fees: Decide if you want to add custom fees to the token. If yes, specify the fee schedule key.
- Role Management: For any token keys set to the smart contract, you can grant or revoke roles to other accounts.
- Proof of Reserve (PoR): Optionally, link your stablecoin to an existing PoR contract or deploy a new one, setting an initial reserve. Note that PoR here is demo-quality.
- PoR Admin: If deploying a new PoR, your current account will become its admin by default.
- Proxy Admin Ownership: Choose the account that will own the proxy admin. It can be set to another account or contract.
- Configuration File: Make sure your configuration file contains the right factory and HederaTokenManager contract addresses.
- Execute: Finally, the CLI will use the configuration file to submit the request, and your stablecoin will be created.
- Additional Contracts: Users who wish to use their own contracts can update the configuration file with the new factory contract ID.
Manage imported tokens
Manage imported tokens
Stablecoins that we have not created with our account but for which we have been assigned one or several roles must be imported in order to operate them.
- Add token
- Refresh token
- Remove token
Operate with an existing stablecoin
Operate with an existing stablecoin
Once a stablecoin is created or added, you can operate with it. The following list contains all the possible operations a user can perform if they have the appropriate role.
- Send Tokens: Transfer tokens to other accounts.
- Cash In: Mint tokens and transfer them to an account. If you have linked a PoR Feed to your stablecoin, this operation will fail in two cases:
- If you try to mint more tokens than the total Reserve (1 to 1 match between the token’s total supply and the Reserve)
-
If you try to mint tokens using more decimals than the Reserve has, for instance, minting 1.001 tokens when the Reserve only has two decimals.
📣 This DOES NOT mean that a stablecoin can not have more decimals than the Reserve, transfers between accounts can use as many decimals as required.
- Check Details: Retrieve the stablecoin’s details.
- Check Balance: Retrieve an account’s balance.
- Burn Tokens: Burn tokens from the treasury account.
- Wipe Tokens: Burn tokens from any account.
- Rescue Tokens: Use the smart contract to transfer tokens from the treasury to a rescue account.
- Rescue HBAR: Similarly, transfer HBAR from the treasury to a rescue account via smart contract.
- Freeze Management: Freeze or unfreeze an account and verify its status. If an account is frozen, it will not be able to transfer any tokens.
- Role Management: Administrators of a stablecoin can manage user roles from this menu. They can grant, revoke, edit (manage the supplier allowance), and check roles.
- The available roles are:
CASHIN_ROLEBURN_ROLEWIPE_ROLERESCUE_ROLEPAUSE_ROLEFREEZE_ROLEKYC_ROLEDELETE_ROLE
- The available roles are:
- Configuration: The last option in the menu allows for dual configuration management of both the stable coin and its underlying token. For the stablecoin, you can upgrade its contract and change its proxy admin. For the token, admins can edit attributes like name, symbol, and keys. To transfer proxy admin ownership, the current owner invites a new account ID and can cancel before acceptance. Once accepted, the ownership change is finalized.
-
Danger Zone: This option groups high-risk stablecoin operations that either impact all token owners or are irreversible. These are placed in a sub-menu to prevent accidental execution.
- Pause/Unpause: Suspend or resume all token operations.
- Delete Token: Permanently remove a token. This action is irreversible.
📣 Take caution when using operations in the “Danger Zone” as they have significant impacts and may not be reversible.
List Stablecoins
List Stablecoins
This option displays all the stable coins the user has created or added.
Configuration
Configuration
This last option allows the user to display the current configuration file, modify the configuration path, change the default network and manage:
- Accounts: Allows the user to change the current account, see all configured accounts and also add new accounts and remove existing ones.
- Mirror nodes: Allows the user to change the current mirror node, see all configured mirror nodes for the selected Hedera network, add new mirror nodes and remove existing ones except for the one that is being used.
- JSON-RPC-Relay services: Allows the user to change the current JSON-RPC-Relay service, see all configured services for the selected Hedera network, add new JSON-RPC-Relay servies and remove existing ones except for the one that is being used.
- Factory: Allows the user to change the factory id of the selected Hedera network in the configuration file, to upgrade the factory’s proxy, to change the factory’s proxy admin owner account and, finally, to view de current factory implementation contract address as well as the factory owner account previously commented.
Create Stablecoin
Start the CLI tool using the wizard command: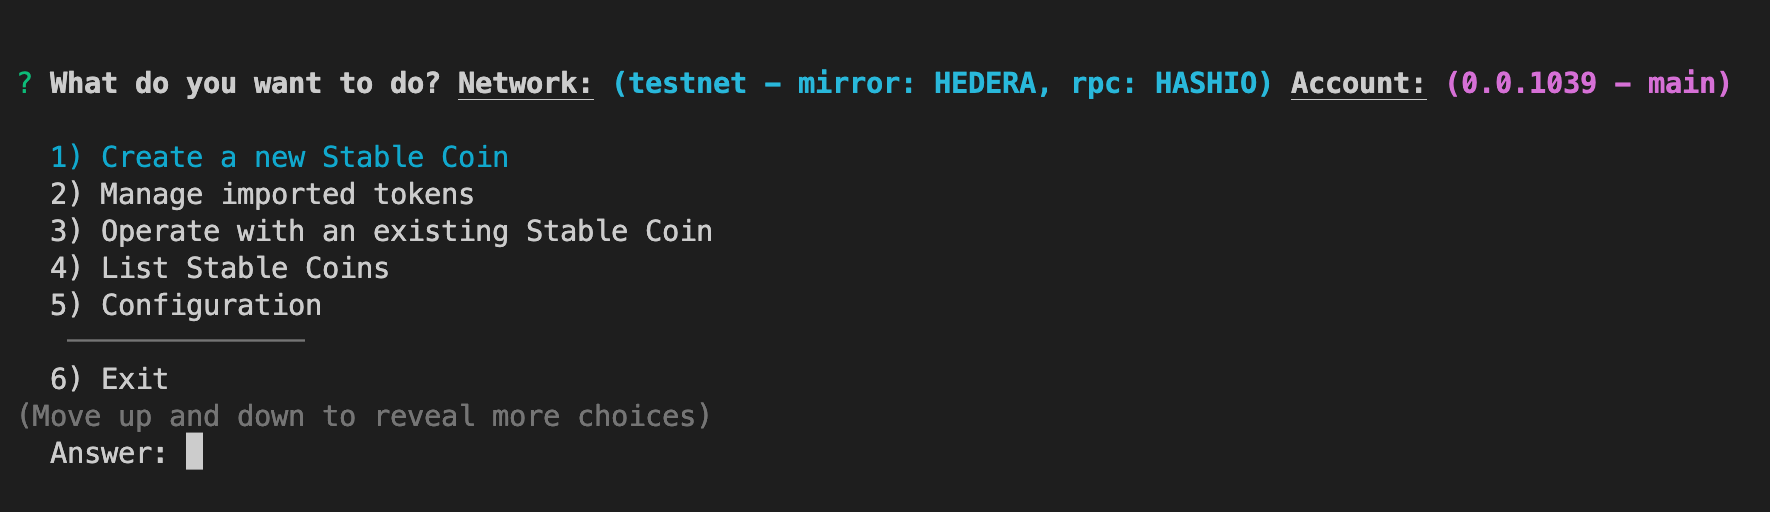
Operate Stablecoin
Start the CLI using the wizard command: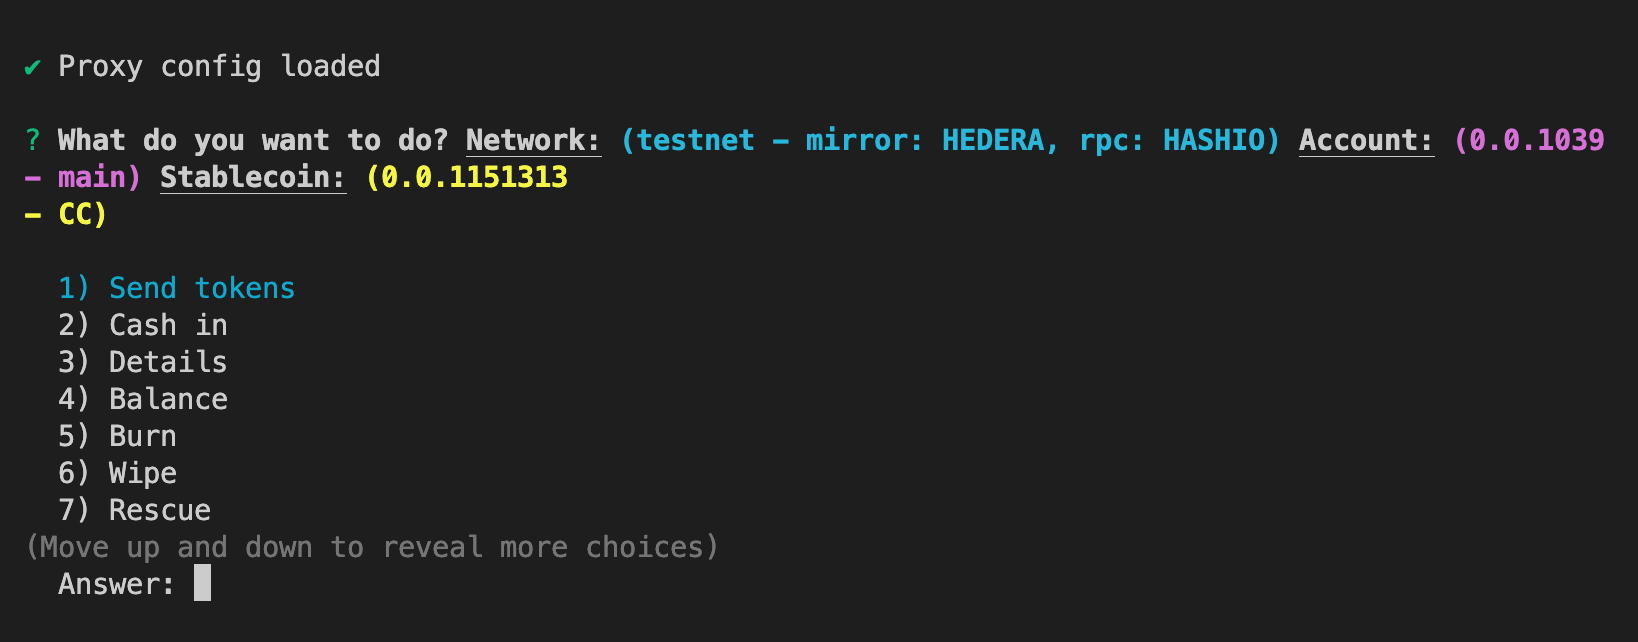
🪙 Here is a list of stablecoin operations.
Configure Proof of Reserve (PoR)
Start the CLI using the wizard command: