Create a Hedera DApp Integrated with WalletConnect
In the dynamic world of decentralized applications (DApps), catering to users with diverse wallet preferences is important.
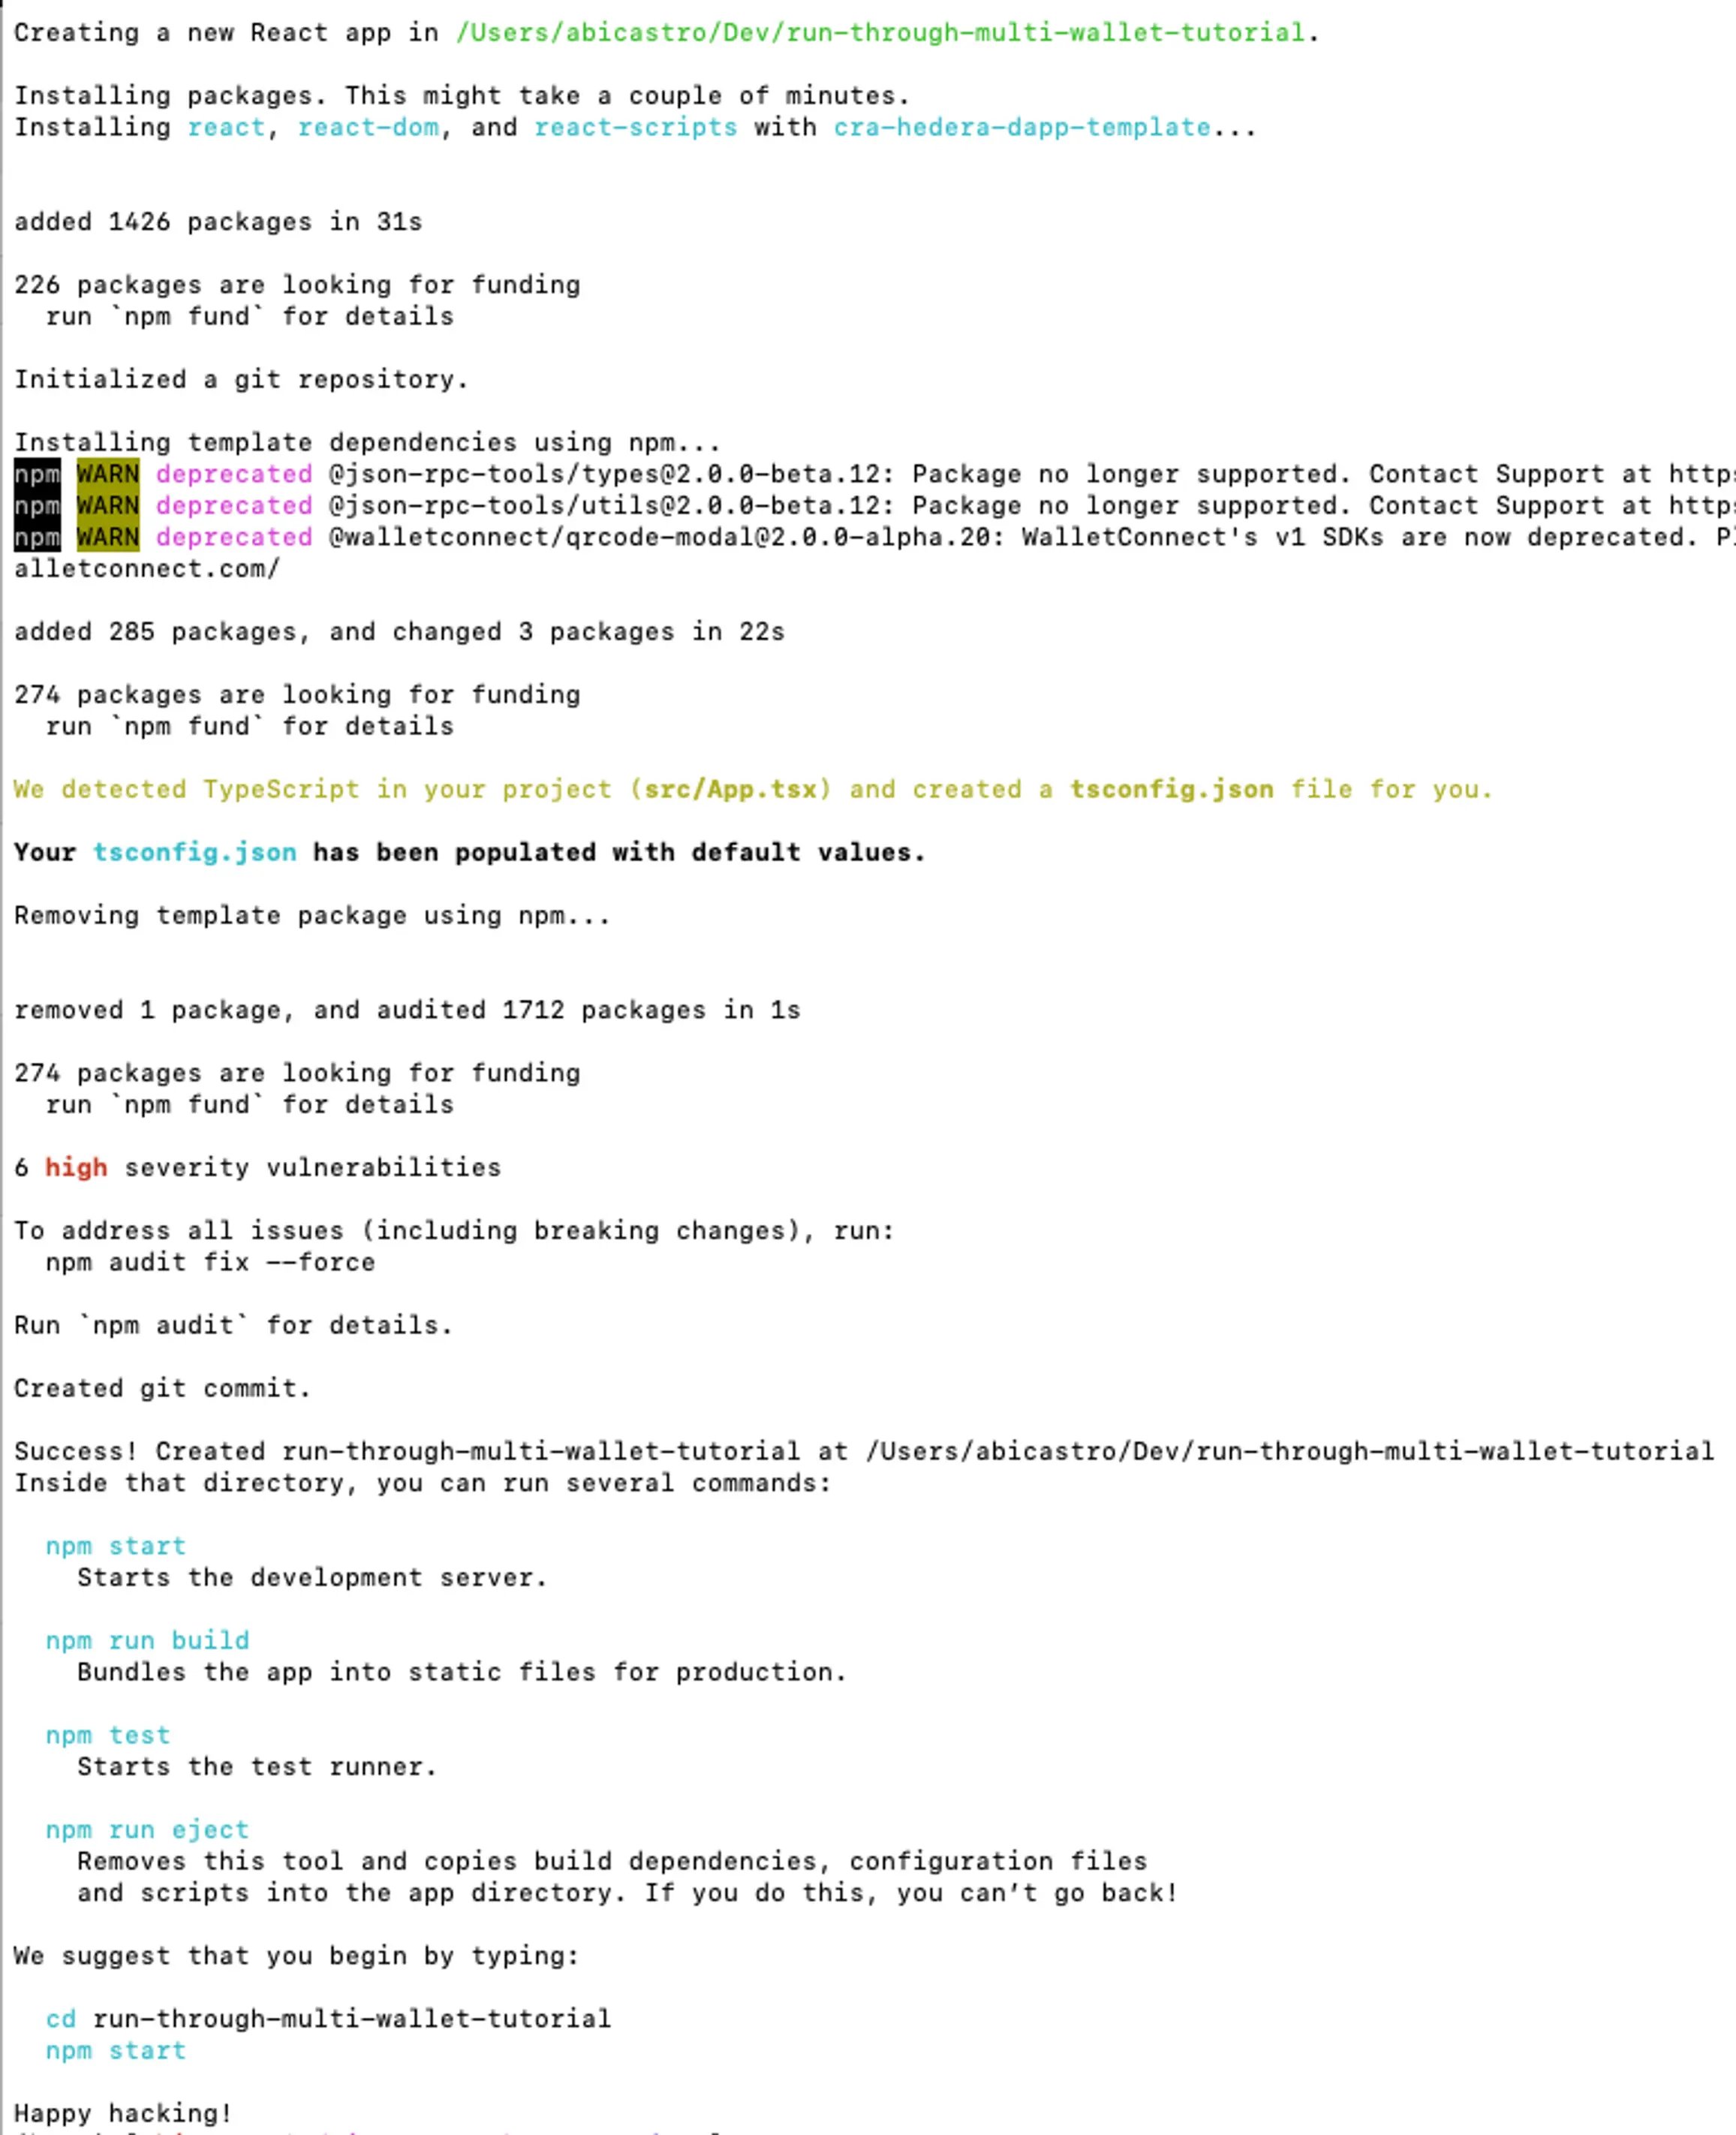
Explore DApp development using the Mirror Node API and Hedera Token Service (HTS). Discover how to integrate HTS functionality into your DApp for seamless token management and transactions. This guide uses React, Material UI, Ethers, and TypeScript with the Create React App (CRA) Hedera DApp template integrated with WalletConnect, streamlining your development process.
2. Fetching Token Data: Writing Mirror Node API Queries
Mirror nodes offer access to historical data from the Hedera network while optimizing the use of network resources. You can easily retrieve information like transactions, records, events, and balances. Visit the mirror node API docs to learn more.In vscode open the file located at src/services/wallets/mirrorNodeClient.ts.This file creates a mirror node client and is used to fetch data from the mirror nodes. We will add new code to help us obtain information about the tokens we currently own.
This client is configured for the Hedera Testnet. For further configuration, go to src/config/network.ts.
We’ll use the Mirror Node API to query information about the tokens we currently own and the quantities of those tokens.Open src/services/wallets/mirrorNodeClient.ts and paste the below interface outside of and above the MirrorNodeClient class.
This interface defines the data fields we need for our DApp, filtering out any extra data from the mirror node response.
Paste the below HTTP GET request outside of and below the MirrorNodeClient class in the src/services/wallets/mirrorNodeClient.ts file.
 // Purpose: get token balances for an account
 // Returns: an array of MirrorNodeAccountTokenBalance
 async getAccountTokenBalances(accountId: AccountId) {
   // get token balances
   const tokenBalanceInfo = await fetch(`${this.url}/api/v1/accounts/${accountId}/tokens?limit=100`, { method: "GET" });
   const tokenBalanceInfoJson = await tokenBalanceInfo.json();

   const tokenBalances = [...tokenBalanceInfoJson.tokens] as MirrorNodeAccountTokenBalance[];

   // because the mirror node API paginates results, we need to check if there are more results
   // if links.next is not null, then there are more results and we need to fetch them until links.next is null
   let nextLink = tokenBalanceInfoJson.links.next;
   while (nextLink !== null) {
     const nextTokenBalanceInfo = await fetch(`${this.url}${nextLink}`, { method: "GET" });
     const nextTokenBalanceInfoJson = await nextTokenBalanceInfo.json();
     tokenBalances.push(...nextTokenBalanceInfoJson.tokens);
     nextLink = nextTokenBalanceInfoJson.links.next;
   }

   return tokenBalances;
 }
File Checkpoint
To ensure you’re on the right track, your `src/services/wallets/mirrorNodeClient.ts` file should look like below.
import { AccountId } from "@hashgraph/sdk";import { NetworkConfig } from "../../config";export interface MirrorNodeAccountTokenBalance { balance: number, token_id: string,}export class MirrorNodeClient { url: string; constructor(networkConfig: NetworkConfig) { this.url = networkConfig.mirrorNodeUrl; } // Purpose: get token balances for an account // Returns: an array of MirrorNodeAccountTokenBalance async getAccountTokenBalances(accountId: AccountId) { // get token balances const tokenBalanceInfo = await fetch(`${this.url}/api/v1/accounts/${accountId}/tokens?limit=100`, { method: "GET" }); const tokenBalanceInfoJson = await tokenBalanceInfo.json(); const tokenBalances = [...tokenBalanceInfoJson.tokens] as MirrorNodeAccountTokenBalance[]; // because the mirror node API paginates results, we need to check if there are more results // if links.next is not null, then there are more results and we need to fetch them until links.next is null let nextLink = tokenBalanceInfoJson.links.next; while (nextLink !== null) { const nextTokenBalanceInfo = await fetch(`${this.url}${nextLink}`, { method: "GET" }); const nextTokenBalanceInfoJson = await nextTokenBalanceInfo.json(); tokenBalances.push(...nextTokenBalanceInfoJson.tokens); nextLink = nextTokenBalanceInfoJson.links.next; } return tokenBalances;} async getAccountInfo(accountId: AccountId) { const accountInfo = await fetch(`${this.url}/api/v1/accounts/${accountId}`, { method: "GET" }); const accountInfoJson = await accountInfo.json(); return accountInfoJson; }}
In the previous step we wrote code to obtain the current token balance of an account. Next we will retieve the type of token (Non-Fungible or Fungible), decimal precision, token name and symbol.Open src/services/wallets/mirrorNodeClient.ts and paste the interface outside of and above the MirrorNodeClient class.
In the previous step we wrote code to obtain the token details (token type, decimals, name, and symbol). Next we will retrieve the NFT serial numbers that are owned.Open src/services/wallets/mirrorNodeClient.ts and paste the interface outside of and above the MirrorNodeClient class.
Paste the below HTTP GET request outside of and below the getTokenInfo function in the src/services/wallets/mirrorNodeClient.ts file.
// Purpose: get NFT Infor for an account// Returns: an array of NFTInfoasync getNftInfo(accountId: AccountId) { const nftInfo = await fetch(`${this.url}/api/v1/accounts/${accountId}/nfts?limit=100`, { method: "GET" }); const nftInfoJson = await nftInfo.json(); const nftInfos = [...nftInfoJson.nfts] as MirrorNodeNftInfo[]; // because the mirror node API paginates results, we need to check if there are more results // if links.next is not null, then there are more results and we need to fetch them until links.next is null let nextLink = nftInfoJson.links.next; while (nextLink !== null) { const nextNftInfo = await fetch(`${this.url}${nextLink}`, { method: "GET" }); const nextNftInfoJson = await nextNftInfo.json(); nftInfos.push(...nextNftInfoJson.nfts); nextLink = nextNftInfoJson.links.next; } return nftInfos;}
2.4 Combine Account Token Balances and Token Information via Data Aggregation
We need to combine all of our HTTP response data in order to display our available tokens in our DApp.Open src/services/wallets/mirrorNodeClient.ts and paste the interface outside of and above the MirrorNodeClient class.
Paste the function outside of and below the getNftInfo function in the src/services/wallets/mirrorNodeClient.ts file.
// Purpose: get token balances for an account with token info in order to display token balance, token type, decimals, etc.// Returns: an array of MirrorNodeAccountTokenBalanceWithInfoasync getAccountTokenBalancesWithTokenInfo(accountId: AccountId): Promise<MirrorNodeAccountTokenBalanceWithInfo[]> { //1. Retrieve all token balances in the account const tokens = await this.getAccountTokenBalances(accountId); //2. Create a map of token IDs to token info and fetch token info for each token const tokenInfos = new Map<string, MirrorNodeTokenInfo>(); for (const token of tokens) { const tokenInfo = await this.getTokenInfo(token.token_id); tokenInfos.set(tokenInfo.token_id, tokenInfo); } //3. Fetch all NFT info in account const nftInfos = await this.getNftInfo(accountId); //4. Create a map of token Ids to arrays of serial numbers const tokenIdToSerialNumbers = new Map<string, number[]>(); for (const nftInfo of nftInfos) { const tokenId = nftInfo.token_id; const serialNumber = nftInfo.serial_number; // if we haven't seen this token_id before, create a new array with the serial number if (!tokenIdToSerialNumbers.has(tokenId)) { tokenIdToSerialNumbers.set(tokenId, [serialNumber]); } else { // if we have seen this token_id before, add the serial number to the array tokenIdToSerialNumbers.get(tokenId)!.push(serialNumber); } } //5. Combine token balances, token info, and NFT info and return return tokens.map(token => { return { ...token, info: tokenInfos.get(token.token_id)!, nftSerialNumbers: tokenIdToSerialNumbers.get(token.token_id) } });}
The getAccountTokenBalancesWithTokenInfo combines token balances, token info and, NFT info in order to display our available tokens in our DApp.
Complete `mirrorNodeClient.ts` file Checkpoint
To ensure you’re on the right track, your `src/services/wallets/mirrorNodeClient.ts` file should look like below.
import { AccountId } from "@hashgraph/sdk";import { NetworkConfig } from "../../config";export interface MirrorNodeAccountTokenBalance { balance: number, token_id: string,}export interface MirrorNodeTokenInfo { type: 'FUNGIBLE_COMMON' | 'NON_FUNGIBLE_UNIQUE', decimals: string, name: string, symbol: string token_id: string,}export interface MirrorNodeNftInfo { token_id: string, serial_number: number,}export interface MirrorNodeAccountTokenBalanceWithInfo extends MirrorNodeAccountTokenBalance { info: MirrorNodeTokenInfo, nftSerialNumbers?: number[],}export class MirrorNodeClient { url: string; constructor(networkConfig: NetworkConfig) { this.url = networkConfig.mirrorNodeUrl; } // Purpose: get token balances for an account // Returns: an array of MirrorNodeAccountTokenBalance async getAccountTokenBalances(accountId: AccountId) { // get token balances const tokenBalanceInfo = await fetch(`${this.url}/api/v1/accounts/${accountId}/tokens?limit=100`, { method: "GET" }); const tokenBalanceInfoJson = await tokenBalanceInfo.json(); const tokenBalances = [...tokenBalanceInfoJson.tokens] as MirrorNodeAccountTokenBalance[]; // because the mirror node API paginates results, we need to check if there are more results // if links.next is not null, then there are more results and we need to fetch them until links.next is null let nextLink = tokenBalanceInfoJson.links.next; while (nextLink !== null) { const nextTokenBalanceInfo = await fetch(`${this.url}${nextLink}`, { method: "GET" }); const nextTokenBalanceInfoJson = await nextTokenBalanceInfo.json(); tokenBalances.push(...nextTokenBalanceInfoJson.tokens); nextLink = nextTokenBalanceInfoJson.links.next; } return tokenBalances; } // Purpose: get token info for a token // Returns: a MirrorNodeTokenInfo async getTokenInfo(tokenId: string) { const tokenInfo = await fetch(`${this.url}/api/v1/tokens/${tokenId}`, { method: "GET" }); const tokenInfoJson = await tokenInfo.json() as MirrorNodeTokenInfo; return tokenInfoJson; } // Purpose: get NFT Infor for an account // Returns: an array of NFTInfo async getNftInfo(accountId: AccountId) { const nftInfo = await fetch(`${this.url}/api/v1/accounts/${accountId}/nfts?limit=100`, { method: "GET" }); const nftInfoJson = await nftInfo.json(); const nftInfos = [...nftInfoJson.nfts] as MirrorNodeNftInfo[]; // because the mirror node API paginates results, we need to check if there are more results // if links.next is not null, then there are more results and we need to fetch them until links.next is null let nextLink = nftInfoJson.links.next; while (nextLink !== null) { const nextNftInfo = await fetch(`${this.url}${nextLink}`, { method: "GET" }); const nextNftInfoJson = await nextNftInfo.json(); nftInfos.push(...nextNftInfoJson.nfts); nextLink = nextNftInfoJson.links.next; } return nftInfos; } // Purpose: get token balances for an account with token info in order to display token balance, token type, decimals, etc. // Returns: an array of MirrorNodeAccountTokenBalanceWithInfo async getAccountTokenBalancesWithTokenInfo(accountId: AccountId): Promise<MirrorNodeAccountTokenBalanceWithInfo[]> { //1. Retrieve all token balances in the account const tokens = await this.getAccountTokenBalances(accountId); //2. Create a map of token IDs to token info and fetch token info for each token const tokenInfos = new Map<string, MirrorNodeTokenInfo>(); for (const token of tokens) { const tokenInfo = await this.getTokenInfo(token.token_id); tokenInfos.set(tokenInfo.token_id, tokenInfo); } //3. Fetch all NFT info in account const nftInfos = await this.getNftInfo(accountId); //4. Create a map of token Ids to arrays of serial numbers const tokenIdToSerialNumbers = new Map<string, number[]>(); for (const nftInfo of nftInfos) { const tokenId = nftInfo.token_id; const serialNumber = nftInfo.serial_number; // if we haven't seen this token_id before, create a new array with the serial number if (!tokenIdToSerialNumbers.has(tokenId)) { tokenIdToSerialNumbers.set(tokenId, [serialNumber]); } else { // if we have seen this token_id before, add the serial number to the array tokenIdToSerialNumbers.get(tokenId)!.push(serialNumber); } } //5. Combine token balances, token info, and NFT info and return return tokens.map(token => { return { ...token, info: tokenInfos.get(token.token_id)!, nftSerialNumbers: tokenIdToSerialNumbers.get(token.token_id) } }); } async getAccountInfo(accountId: AccountId) { const accountInfo = await fetch(`${this.url}/api/v1/accounts/${accountId}`, { method: "GET" }); const accountInfoJson = await accountInfo.json(); return accountInfoJson; }}
Before a user can receive a new token, they must associate with it. This association helps protect users from receiving unwanted tokens.Open src/services/wallets/mirrorNodeClient.ts and paste the function below the getAccountTokenBalancesWithTokenInfo function.
// Purpose: check if an account is associated with a token// Returns: true if the account is associated with the token, false otherwiseasync isAssociated(accountId: AccountId, tokenId: string) { const accountTokenBalance = await this.getAccountTokenBalances(accountId); return accountTokenBalance.some(token => token.token_id === tokenId);}
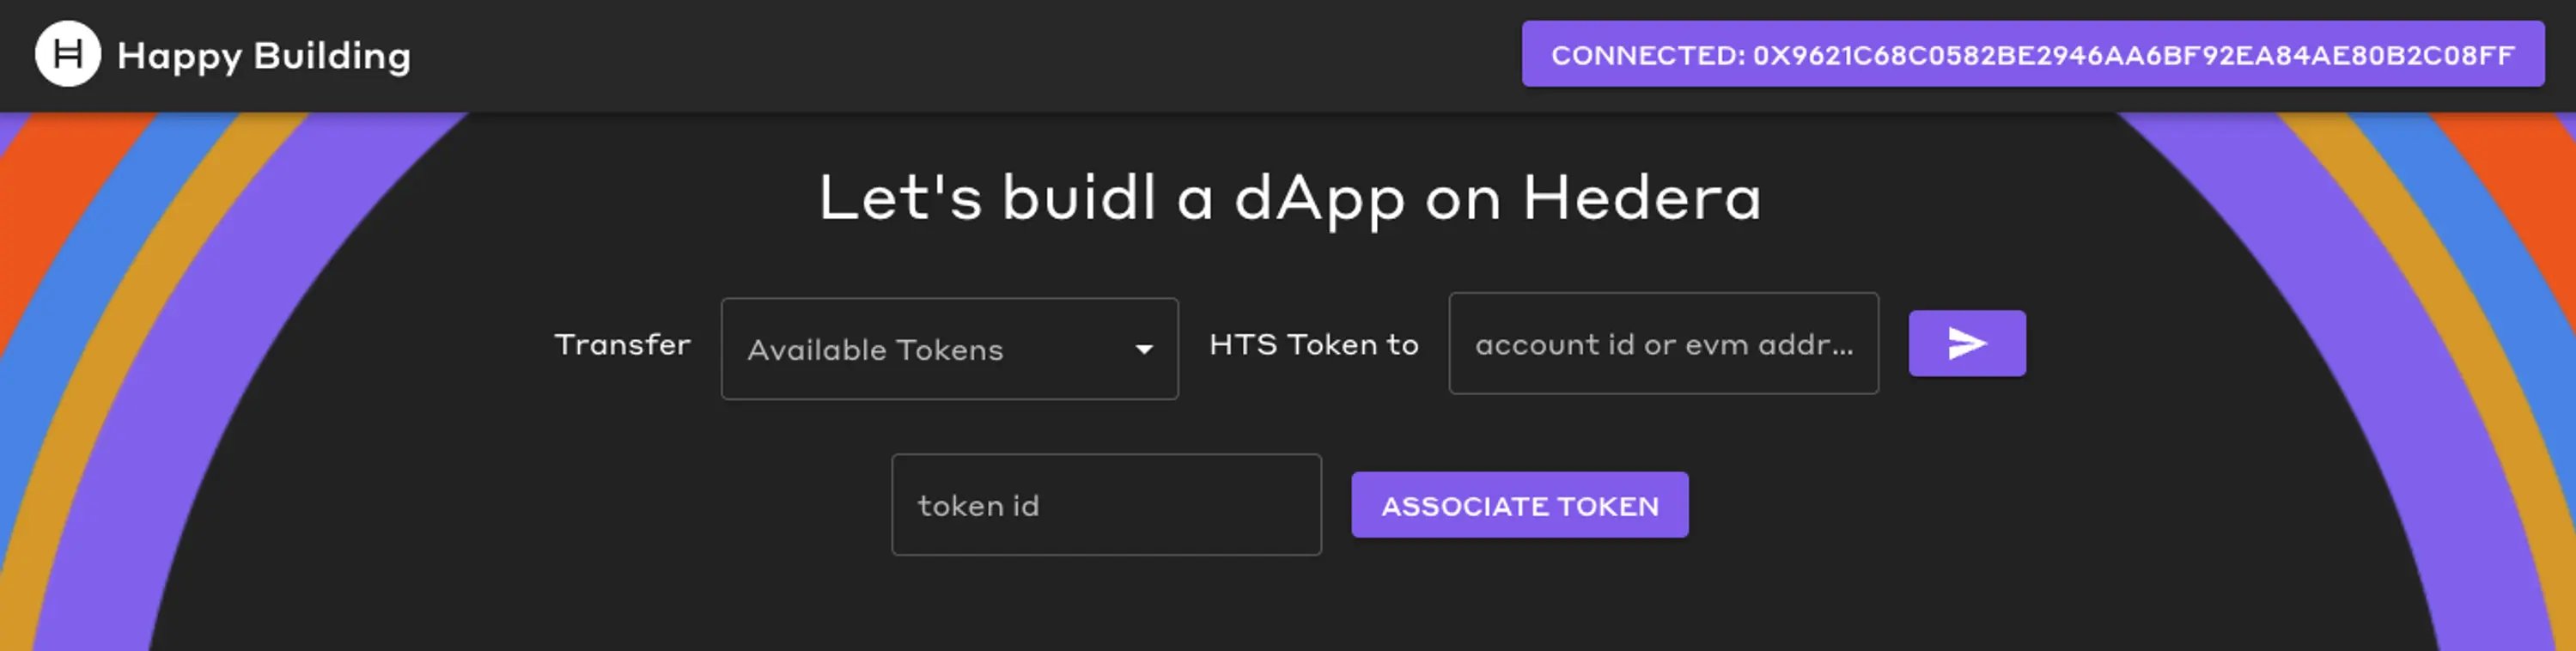
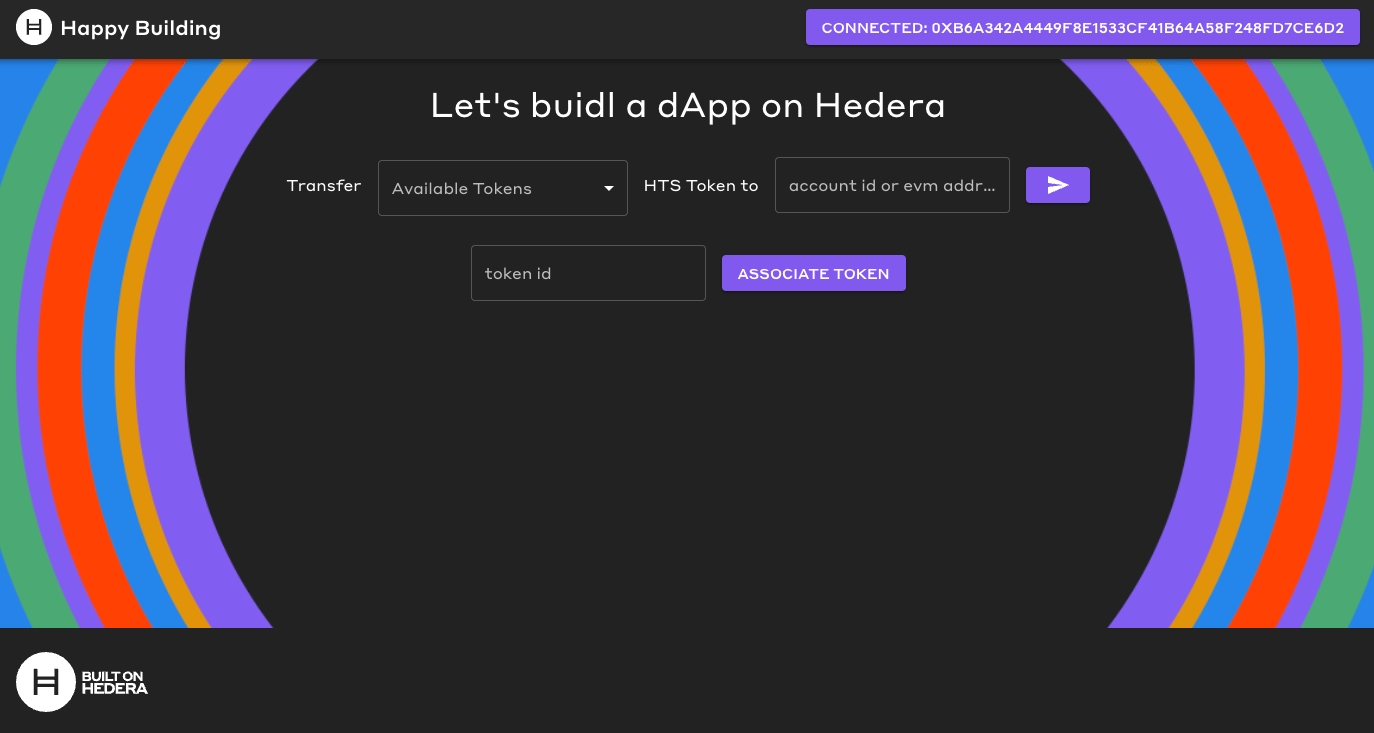
In this step, we’ll copy and paste the home.tsx file, which contains all the necessary code for adding UI components that enable token transfers and association with a token.Open src/pages/Home.tsx and replace the existing code by pasting the below code:
`Home.tx` file
import { Button, MenuItem, TextField, Typography } from "@mui/material";import { Stack } from "@mui/system";import { useWalletInterface } from "../services/wallets/useWalletInterface";import SendIcon from '@mui/icons-material/Send';import { useEffect, useState } from "react";import { AccountId, TokenId } from "@hashgraph/sdk";import { MirrorNodeAccountTokenBalanceWithInfo, MirrorNodeClient } from "../services/wallets/mirrorNodeClient";import { appConfig } from "../config";const UNSELECTED_SERIAL_NUMBER = -1;export default function Home() { const { walletInterface, accountId } = useWalletInterface(); const [toAccountId, setToAccountId] = useState(""); const [amount, setAmount] = useState<number>(0); // include all of this necessary for dropdown const [availableTokens, setAvailableTokens] = useState<MirrorNodeAccountTokenBalanceWithInfo[]>([]); const [selectedTokenId, setSelectedTokenId] = useState<string>(''); const [serialNumber, setSerialNumber] = useState<number>(UNSELECTED_SERIAL_NUMBER); const [tokenIdToAssociate, setTokenIdToAssociate] = useState(""); // include all of this necessary for dropdown // Purpose: Get the account token balances with token info for the current account and set them to state useEffect(() => { if (accountId === null) { return; } const mirrorNodeClient = new MirrorNodeClient(appConfig.networks.testnet); // Get token balance with token info for the current account mirrorNodeClient.getAccountTokenBalancesWithTokenInfo(AccountId.fromString(accountId)).then((tokens) => { // set to state setAvailableTokens(tokens); console.log(tokens); }).catch((error) => { console.error(error); }); }, [accountId]) // include all of this necessary for dropdown // Filter out tokens with a balance of 0 const tokensWithNonZeroBalance = availableTokens.filter((token) => token.balance > 0); // include all of this necessary for dropdown // Get the selected token balance with info const selectedTokenBalanceWithInfo = availableTokens.find((token) => token.token_id === selectedTokenId); // include all of this necessary for dropdown // reset amount and serial number when token id changes useEffect(() => { setAmount(0); setSerialNumber(UNSELECTED_SERIAL_NUMBER); }, [selectedTokenId]); return ( <Stack alignItems="center" spacing={4}> <Typography variant="h4" color="white" > Let's buidl a dApp on Hedera </Typography> {walletInterface !== null && ( <> <Stack direction='row' gap={2} alignItems='center' > <Typography> Transfer </Typography> <TextField label='Available Tokens' value={selectedTokenId} select onChange={(e) => setSelectedTokenId(e.target.value)} sx={{ width: '250px', height: '50px', }} > <MenuItem value={''} > Select a token </MenuItem> {tokensWithNonZeroBalance.map((token) => { const tokenBalanceAdjustedForDecimals = token.balance / Math.pow(10, Number.parseInt(token.info.decimals)); return ( <MenuItem key={token.token_id} value={token.token_id} > {token.info.name}({token.token_id}): ({tokenBalanceAdjustedForDecimals}) </MenuItem> ); } )} </TextField> {selectedTokenBalanceWithInfo?.info?.type === "NON_FUNGIBLE_UNIQUE" && ( <TextField label='Serial Number' select value={serialNumber.toString()} onChange={(e) => setSerialNumber(Number.parseInt(e.target.value))} sx={{ width: '190px', height: '50px', }} > <MenuItem value={UNSELECTED_SERIAL_NUMBER} > Select a Serial Number </MenuItem> {selectedTokenBalanceWithInfo.nftSerialNumbers?.map((serialNumber) => { return ( <MenuItem key={serialNumber} value={serialNumber} > {serialNumber} </MenuItem> ); } )} </TextField> )} {selectedTokenBalanceWithInfo?.info?.type === "FUNGIBLE_COMMON" && ( <TextField type='number' label='amount' value={amount} onChange={(e) => setAmount(parseInt(e.target.value))} sx={{ maxWidth: '100px' }} /> )} {/* not included in the dropdown stage. this is in the association/send stage */} <Typography> HTS Token to </Typography> <TextField value={toAccountId} onChange={(e) => setToAccountId(e.target.value)} label='account id or evm address' /> <Button variant='contained' onClick={async () => { if (selectedTokenBalanceWithInfo === undefined) { console.log(`Token Id is empty.`) return; } // check if receiver has associated const mirrorNodeClient = new MirrorNodeClient(appConfig.networks.testnet); const isAssociated = await mirrorNodeClient.isAssociated(AccountId.fromString(toAccountId), selectedTokenId); if (!isAssociated) { console.log(`Receiver is not associated with token id: ${selectedTokenId}`); return; } if (selectedTokenBalanceWithInfo.info.type === "NON_FUNGIBLE_UNIQUE") { await walletInterface.transferNonFungibleToken( AccountId.fromString(toAccountId), TokenId.fromString(selectedTokenId), serialNumber); } else { const amountWithDecimals = amount * Math.pow(10, Number.parseInt(selectedTokenBalanceWithInfo.info.decimals)); await walletInterface.transferFungibleToken( AccountId.fromString(toAccountId), TokenId.fromString(selectedTokenId), amountWithDecimals); } }} > <SendIcon /> </Button> </Stack> <Stack direction='row' gap={2} alignItems='center' > <TextField value={tokenIdToAssociate} label='token id' onChange={(e) => setTokenIdToAssociate(e.target.value)} /> <Button variant='contained' onClick={async () => { if (tokenIdToAssociate === "") { console.log(`Token Id is empty.`) return; } await walletInterface.associateToken(TokenId.fromString(tokenIdToAssociate)); }} > Associate Token </Button> </Stack> </> )} </Stack> )}
The crucial part of the code is found within the following code:
// include all of this necessary for dropdown
  // Purpose: Get the account token balances with token info for the current account and set them to state
  useEffect(() => {
    if (accountId === null) {
      return;
    }
    const mirrorNodeClient = new MirrorNodeClient(appConfig.networks.testnet);
    // Get token balance with token info for the current account
    mirrorNodeClient.getAccountTokenBalancesWithTokenInfo(AccountId.fromString(accountId)).then((tokens) => {
      // set to state
      setAvailableTokens(tokens);
      console.log(tokens);
    }).catch((error) => {
      console.error(error);
    });
  }, [accountId])
This code fetches and updates the list of tokens a user owns providing the available tokens to the dropdown menu.
You’ll be creating four Hedera Testnet accounts, each with a balance of 10 HBAR. Two of these accounts will come pre-loaded with their own fungible tokens, and four accounts will come pre-loaded with their own non-fungible tokens (NFTs).Open a new terminal window and create a new directory and change into that directory
mkdir hedera-test-accounts && cd hedera-test-accounts
Open hedera-test-accounts folder in a new visual studio code window.Create a new file and name it .env with the following contents. Remember to enter your account ID and your private key.
OPERATOR_ID=<enter your account id>OPERATOR_KEY=<enter your DER private key>
Within the hedera-test-accounts home directory, execute the following command in the terminal,
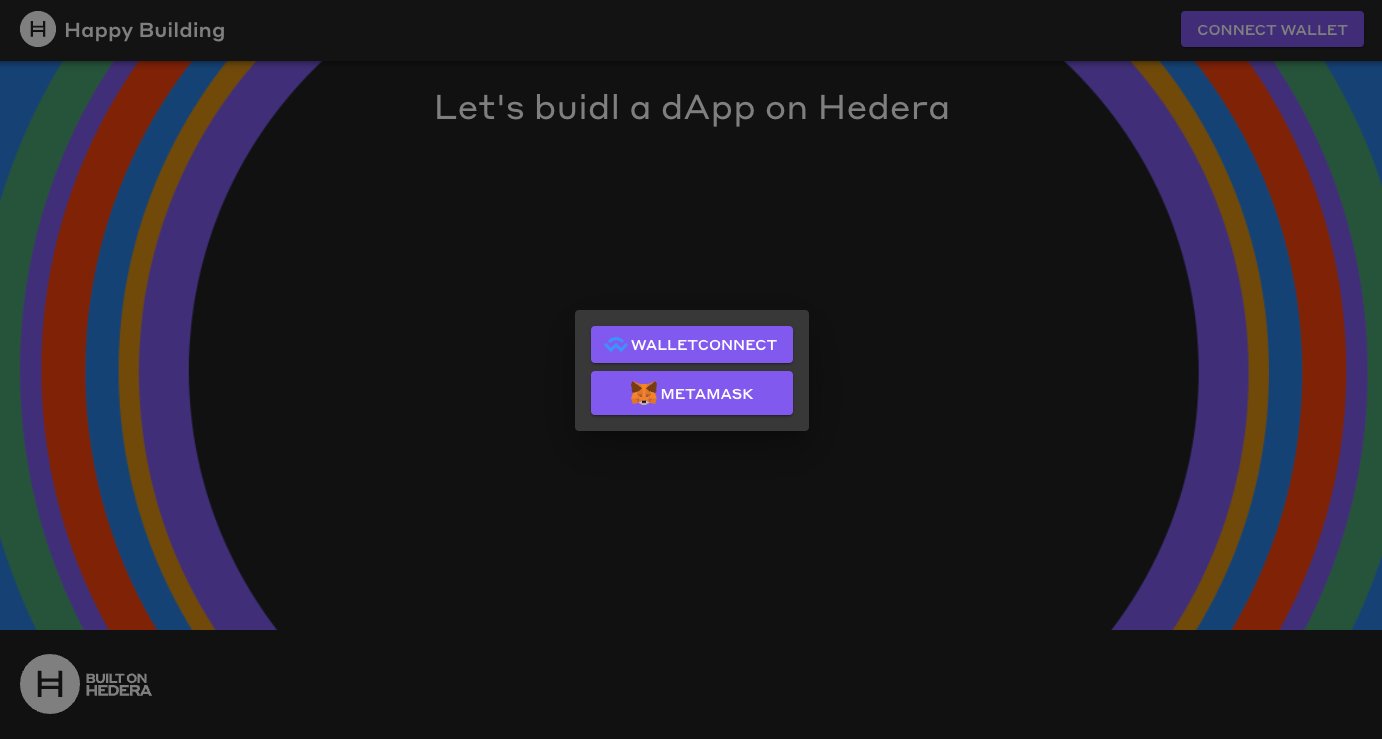
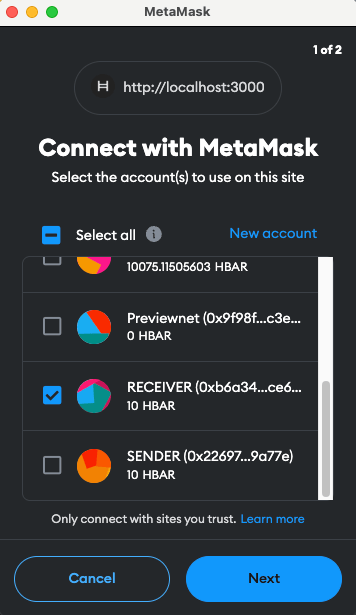
Import the sender and receiver accounts that were just outputted into your preferred wallet application. (MetaMask, HashPack, or Kabila)For assistance on how to import a Hedera account into MetaMask refer to our documentation here.
Rename your imported accounts within your preferred wallet to keep track which is the sender and receiver account.
4.5 Associate Receiver Account with Sender Account NFT
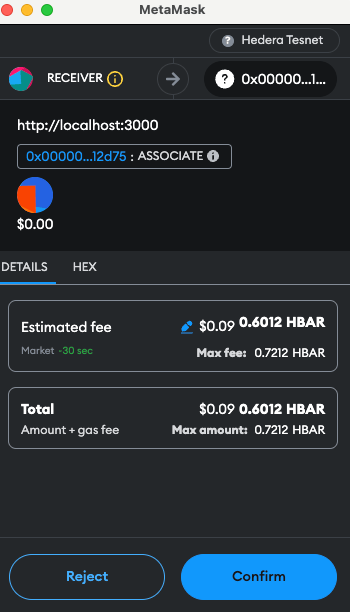
Open the output of the test accounts you created earlier and copy the ecdsaWithAlias Sender’s account NftTokenIdPaste the NftTokenId in the DApps associate token textbox and click the button Associate
MetaMask will prompt you to sign the transaction. If the extension does not automatically open, you will need to manually click on the MetaMask extension.
Confirm the transaction
The react template uses the Hashio JSON RPC Relay URL to work with MetaMask. If you are experiencing degraded performance, follow this guide to switch to Arkhia or set up your own JSON RPC Relay. Edit the src/config/networks.ts with the new JSON RPC Relay URL.
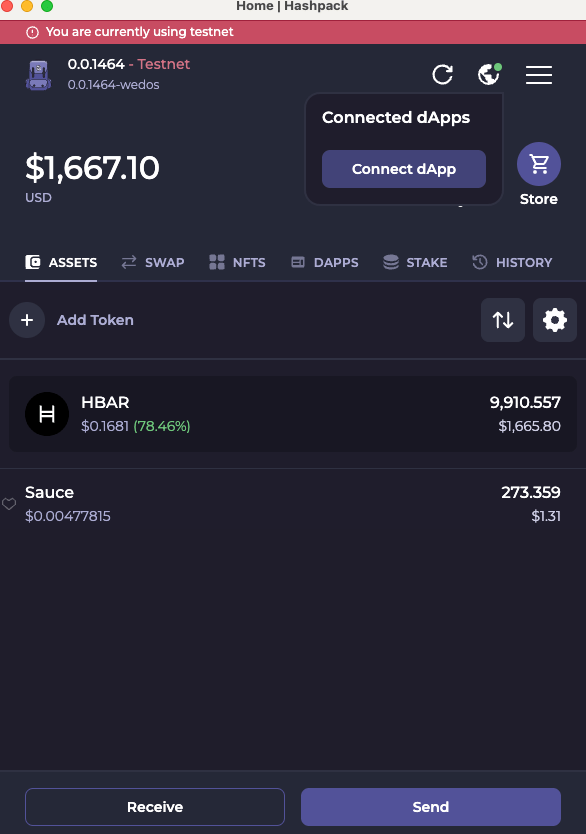
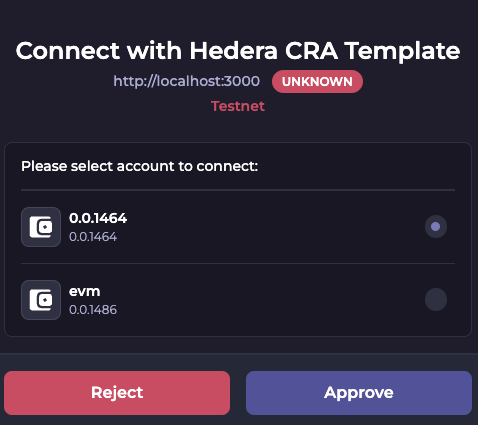
Disconnect as the Receiver account and reconnect with the Sender account. To do this, open the MetaMask extension, click on the three dots in the upper right, select “Connected Sites,” and then disconnect the Receiver account. All other wallets disconnect by clicking on your account ID in the upper right of the DApp homepage.Connect to the DApp as the Sender Account.As the Sender,
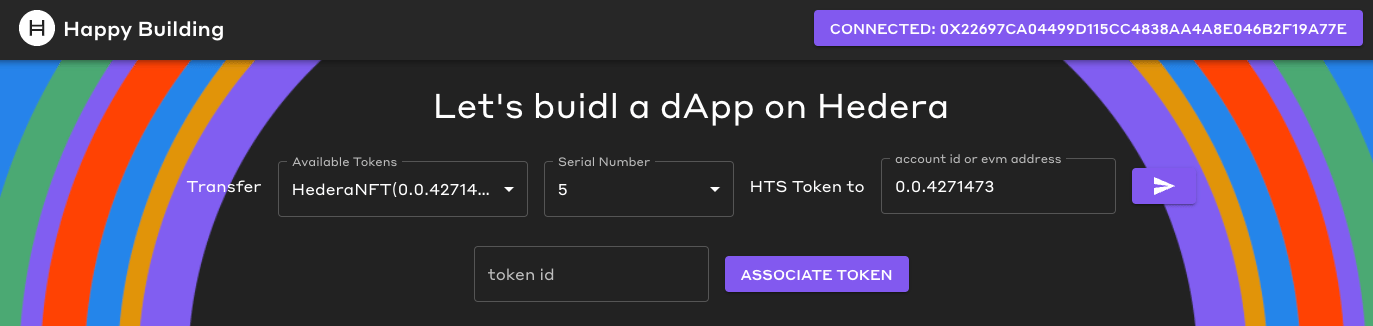
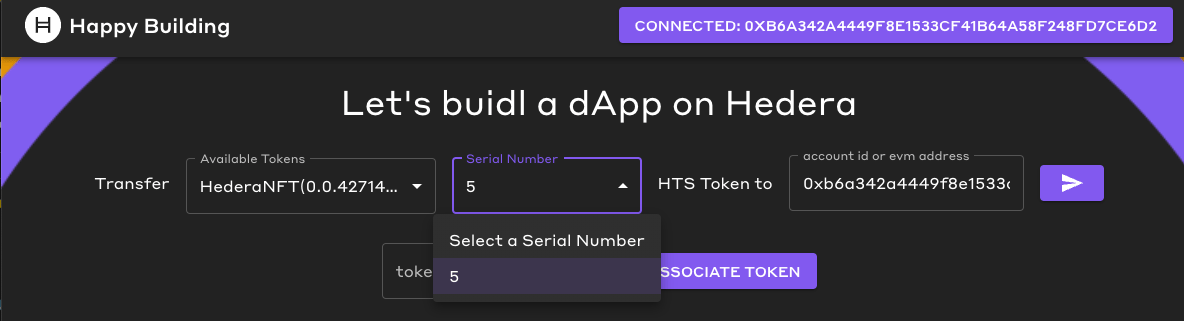
Select from available tokens the HederaNFT
Select the NFT with serial number 5 from the drop-down menu.
Enter the account ID or EVM address of the Receiver account.
Click the “send” button.
Sign the transaction on MetaMask to complete the transfer of the NFT from the Sender to the receiver account.
Disconnect as the Sender account and reconnect as the Receiver account.Check the dropdown menu and ensure the Receiver account has NFT serial number 5.
🎉 Congratulations! You have successfully walked through creating a Hedera DApp that transfers HTS tokens using MetaMask, HashPack, Blade, or Kabila.You have learned how to:
Query the mirror node for account token balance, token information, and Non-fungible information.
Query the mirror node to check if the receiver has associated with a token ID
Associate an HTS token with HashPack, Kabila, Blade, or MetaMask through a UI