Use this file to discover all available pages before exploring further.
The Hedera JSON RPC Relay enables developers to use their favorite EVM-compatible tools such as Truffle, Hardhat, Web3JS, EthersJS, to deploy and interact with smart contracts on the Hedera network. As highlighted in a previous article, the relay provides applications and tools seamless access to Hedera while masking implementation complexities and preventing reductions in performance, security, and scalability.This tutorial shows you how to deploy smart contracts on Hedera using Truffle and the JSON RPC Relay with the following steps:
Create an account that has ECDSA keys using the Javascript SDK
Compile a contract using Truffle
Deploy the smart contract to Hedera network through the JSON RPC Relay
You can find more examples using Truffle, Web3JS, and Hardhat in this GitHub repository.
Hedera supports two popular types of signature algorithms, ED25519 and ECDSA. Both are used in many blockchain platforms, including Bitcoin and Ethereum. Currently, the JSON RPC Relay only supports Hedera accounts with an alias set (i.e. public address) based on its ECDSA public key. To deploy a smart contract using Truffle, we first have to create a new account that meets these criteria. The main() function in create-account.js helps us do just that.In case you’re interested in more details about auto account creation and alias, check out the documentation and HIP-32.
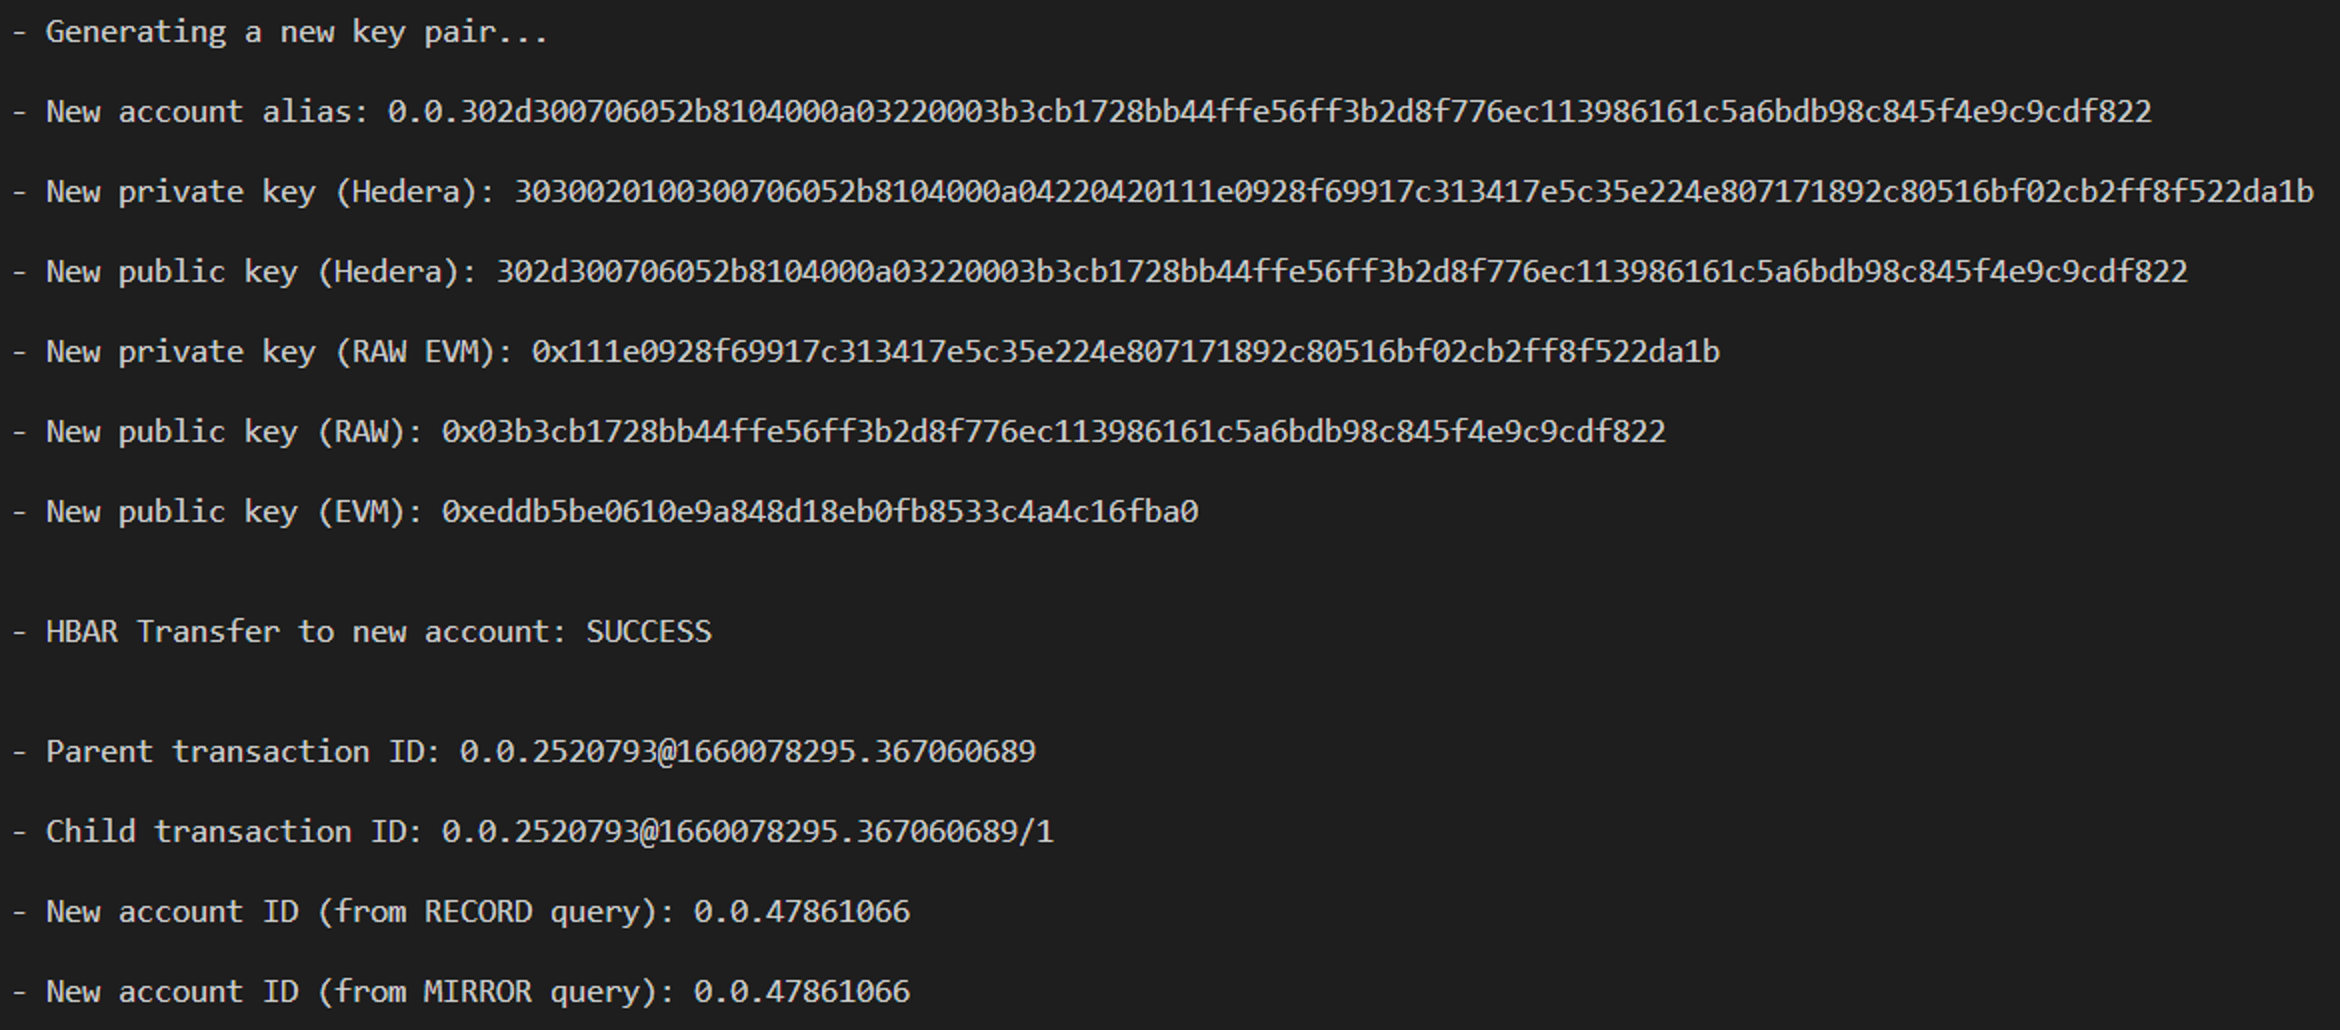
async function main() { // Generate ECDSA key pair console.log("- Generating a new key pair... \n"); const newPrivateKey = PrivateKey.generateECDSA(); const newPublicKey = newPrivateKey.publicKey; const newAliasAccountId = newPublicKey.toAccountId(0, 0); console.log(`- New account alias: ${newAliasAccountId} \n`); console.log(`- New private key (Hedera): ${newPrivateKey} \n`); console.log(`- New public key (Hedera): ${newPublicKey} \n`); console.log( `- New private key (RAW EVM): 0x${newPrivateKey.toStringRaw()} \n` ); console.log(`- New public key (RAW): 0x${newPublicKey.toStringRaw()} \n`); console.log( `- New public key (EVM): 0x${newPublicKey.toEthereumAddress()} \n\n` ); // Transfer HBAR to newAliasAccountId to auto-create the new account // Get account information from a transaction record query const [txReceipt, txRecQuery] = await autoCreateAccountFcn( operatorId, newAliasAccountId, 100 ); console.log(`- HBAR Transfer to new account: ${txReceipt.status} \n\n`); console.log(`- Parent transaction ID: ${txRecQuery.transactionId} \n`); console.log( `- Child transaction ID: ${txRecQuery.children[0].transactionId.toString()} \n` ); console.log( `- New account ID (from RECORD query): ${txRecQuery.children[0].receipt.accountId.toString()} \n` ); // Get account information from a mirror node query const mirrorQueryResult = await mirrorQueryFcn(newPublicKey); console.log( `- New account ID (from MIRROR query): ${mirrorQueryResult.data?.accounts[0].account} \n` );}
Executing this code generates a new ECDSA key pair, displays the information about the keys in Hedera and EVM formats, and transfers HBAR to the account alias (newAliasAccountId) to auto-create a Hedera account that meets the criteria mentioned before. Information about the new account is obtained in two ways, a transaction record query and a mirror node query.Console Output:
IMPORTANT NOTE: Private keys for Testnet are displayed here for educational purposes only. Never share your private key(s) with others, as that may result in lost funds, or loss of control over your account.The next step is to deploy a smart contract using Truffle and the newly created Hedera account. Copy the value from “New private key (RAW EVM)” in the console output and paste it into the ETH_PRIVATE_KEY variable in the .env file (if you cloned the repository, you may need to rename the file from .env_sample to .env).
The functions autoCreateAccountFcn() and mirrorQueryFcn() perform the auto account creation and mirror query, respectively.
async function autoCreateAccountFcn( senderAccountId, receiverAccountId, hbarAmount) { //Transfer hbar to the account alias to auto-create account const transferToAliasTx = new TransferTransaction() .addHbarTransfer(senderAccountId, new Hbar(-hbarAmount)) .addHbarTransfer(receiverAccountId, new Hbar(hbarAmount)) .freezeWith(client); const transferToAliasSign = await transferToAliasTx.sign(operatorKey); const transferToAliasSubmit = await transferToAliasSign.execute(client); const transferToAliasRx = await transferToAliasSubmit.getReceipt(client); // Get a transaction record and query the record to get information about the account creation const transferToAliasRec = await transferToAliasSubmit.getRecord(client); const txRecordQuery = await new TransactionRecordQuery() .setTransactionId(transferToAliasRec.transactionId) .setIncludeChildren(true) .execute(client); return [transferToAliasRx, txRecordQuery];}
async function mirrorQueryFcn(publicKey) { // Query a mirror node for information about the account creation await delay(10000); // Wait for 10 seconds before querying account id const mirrorNodeUrl = "https://testnet.mirrornode.hedera.com/api/v1/"; const mQuery = await axios.get( mirrorNodeUrl + "accounts?account.publickey=" + publicKey.toStringRaw() ); return mQuery;}
Finally, deploy the contract on Hedera through the JSON RPC Relay. Be sure to configure the following parameters in your .env file to be able to deploy to the Hedera testnet with Truffle.
NETWORK_ID = 296JSON_RPC_RELAY_URL = https://testnet.hashio.io/apiETH_PRIVATE_KEY = 0x7a9e... [Run create-account.js and paste value of “New private key (RAW EVM)”]
This example uses the Hashio instance of the JSON RPC Relay, hosted by Hashgraph. URLs are also available for the Hedera Mainnet and Previewnet.Deploy the contract with the following command:
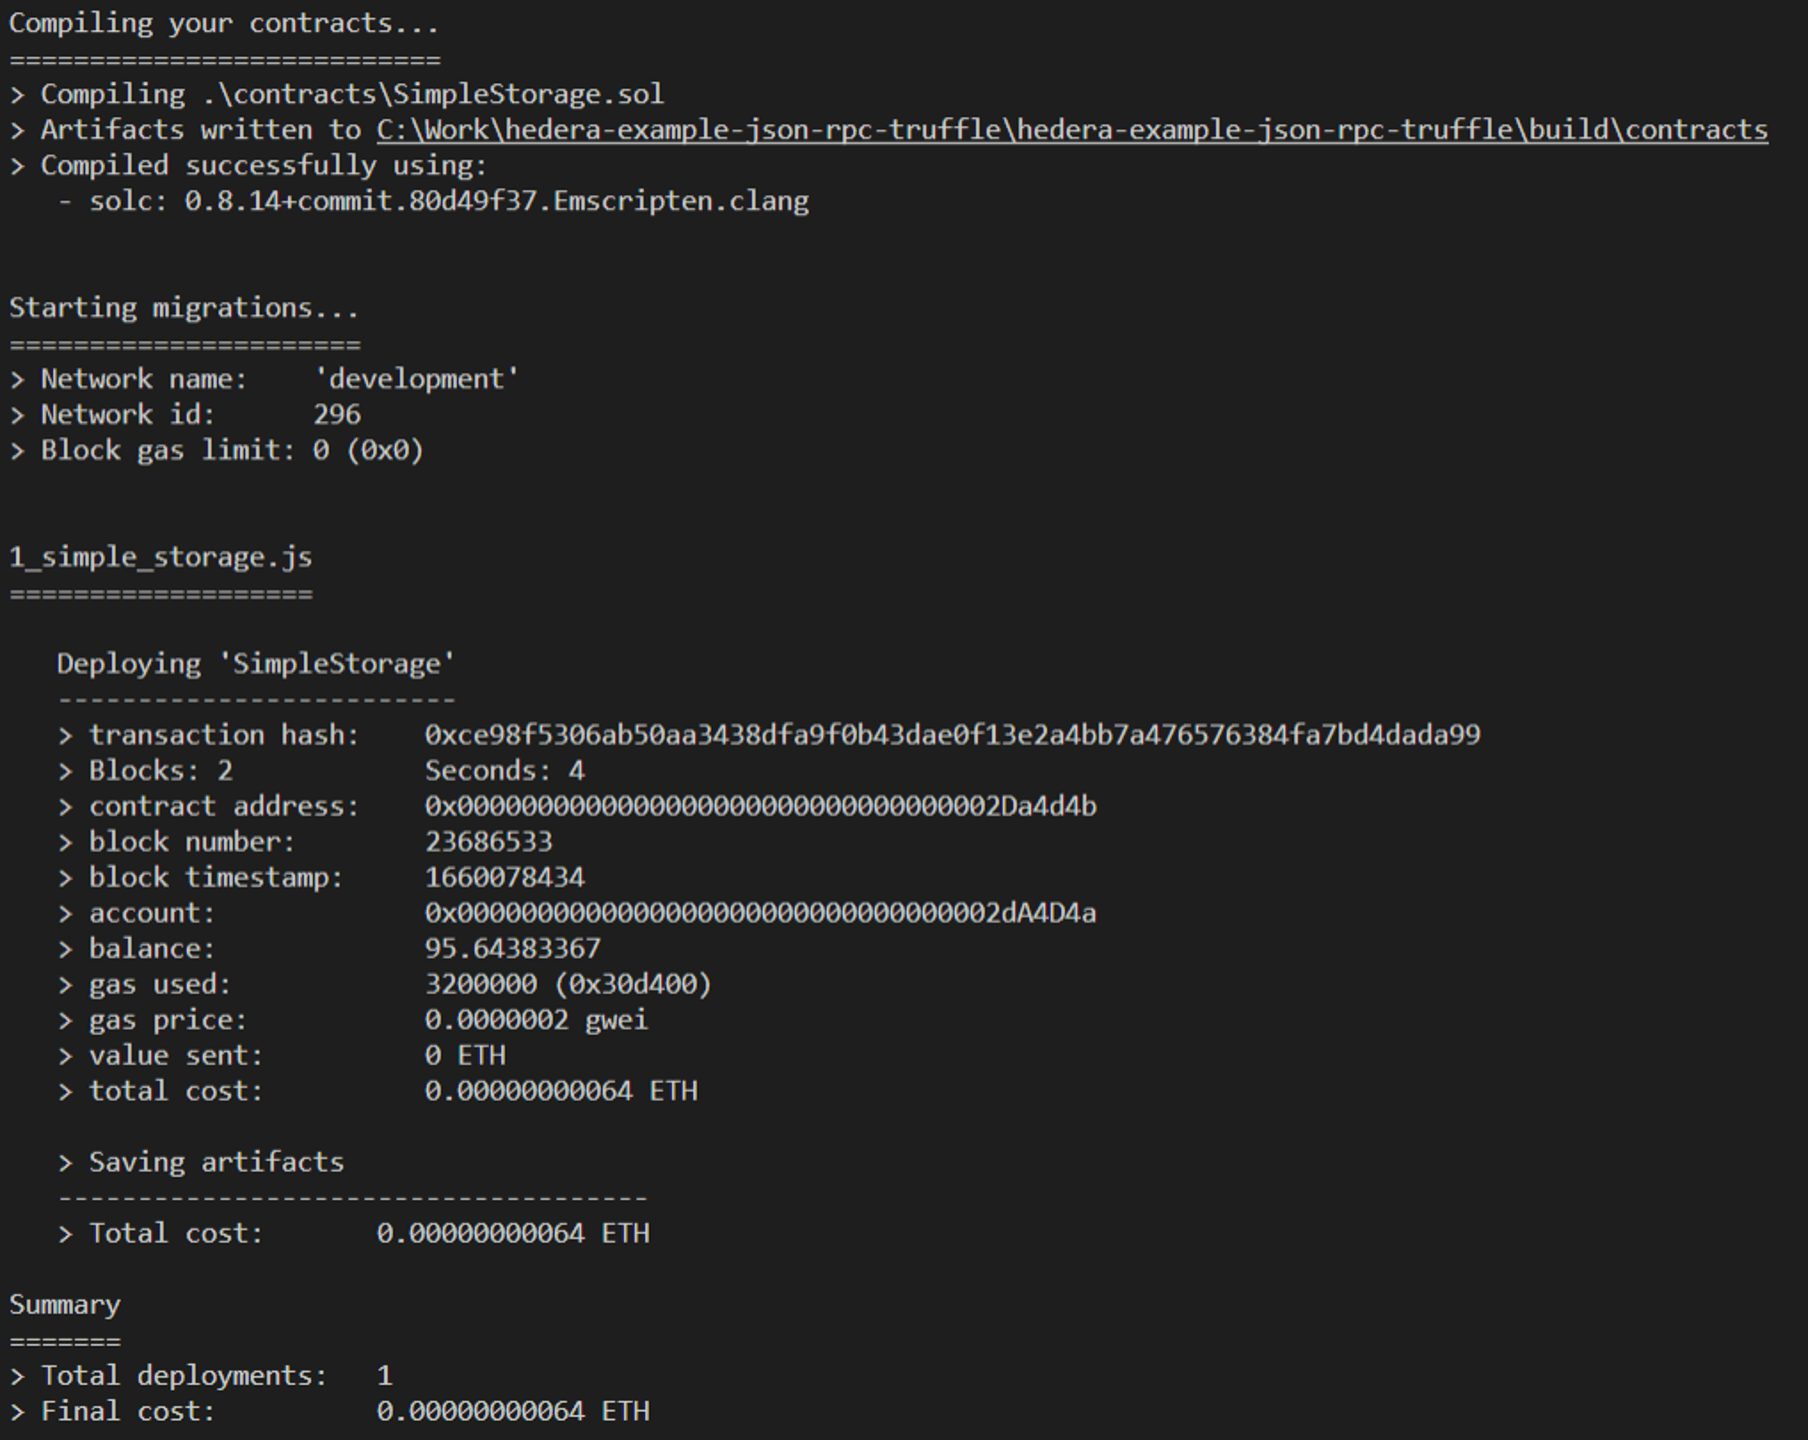
truffle migrate
Console Output ✅
You can obtain more information about the newly deployed contract using the mirror node REST API. Additional context for that API is provided in this blog post. Based on the console output of the example above, here are two mirror node queries that provide more information about the new contract and account based on their respective Solidity addresses:
Now you know how to deploy smart contracts on Hedera using Truffle and the JSON RPC Relay. The first part of this example used the Hedera JavaScript SDK. However, you can try this with the other officially supported SDKs for Java and Go.